 Golf Course Review by: Billy Satterfield
Rankings:


The Takeaway: One of Jack Nicklaus’ most visually impressive courses with gorgeous bunkering and Lake Taupo delivering an attractive background, Kinloch is also New Zealand’s stiffest test. With artificial mounding throughout, finding a level lie is nearly impossible which can create havoc considering how penal missing your targets can be. While some of the architecture would be difficult to enjoy on a daily basis, Kinloch certainly keeps you guessing on what Jack is throwing at you next and delivers a memorable experience. Grade B+
Quick Facts
Designer: Jack Nicklaus in 2007
Cost: $235 NZD - $350 NZD Click for current rates
Phone Number: +64 7 377 8482
Course Website: Official Website - Visit The Kinloch Club's official website by clicking on the link provided.
Directions: Get here! - 261 Kinloch Road, Kinloch, Taupo 3377 – NEW ZEALAND
Photos: See additional photos of The Kinloch Club
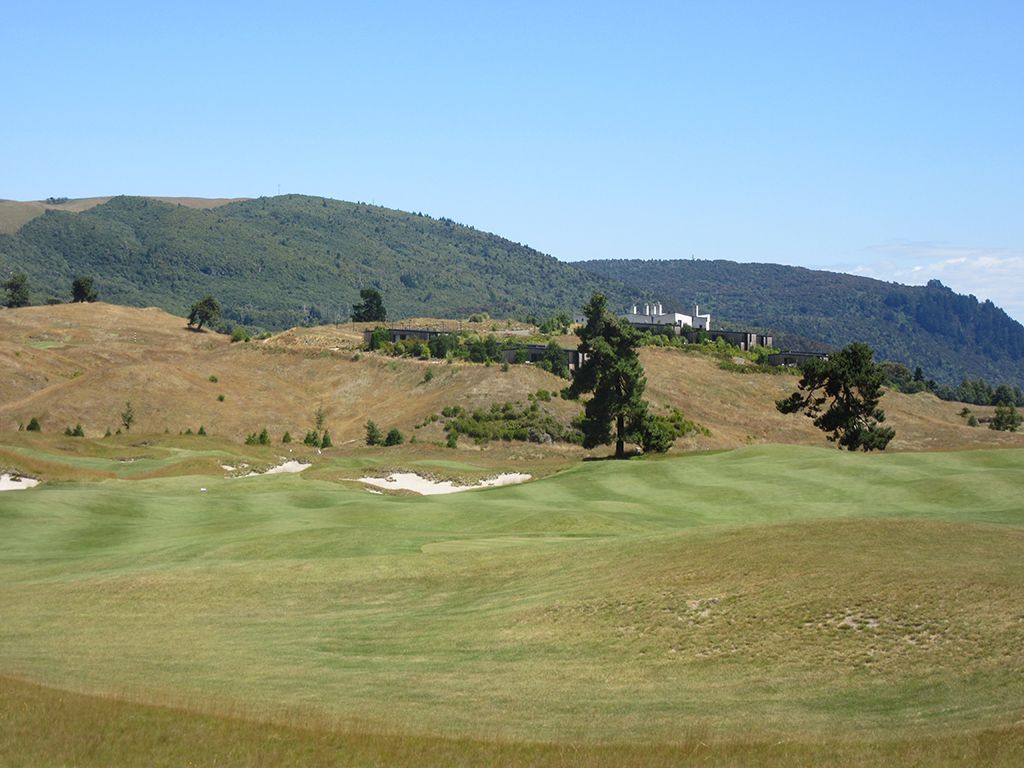
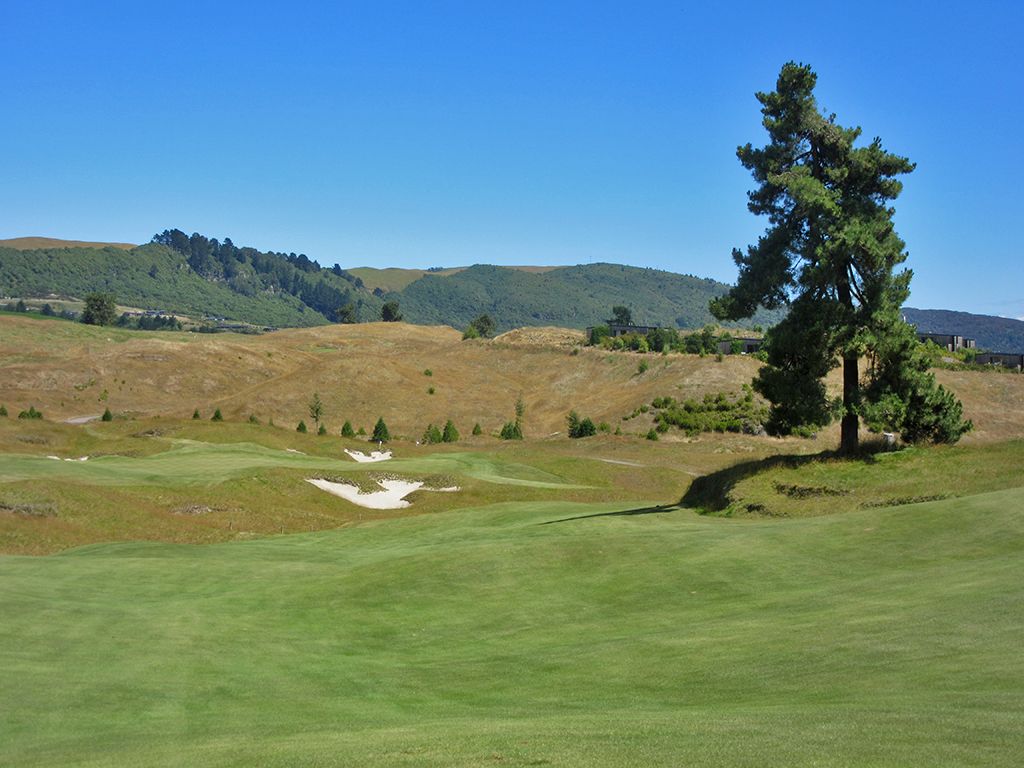
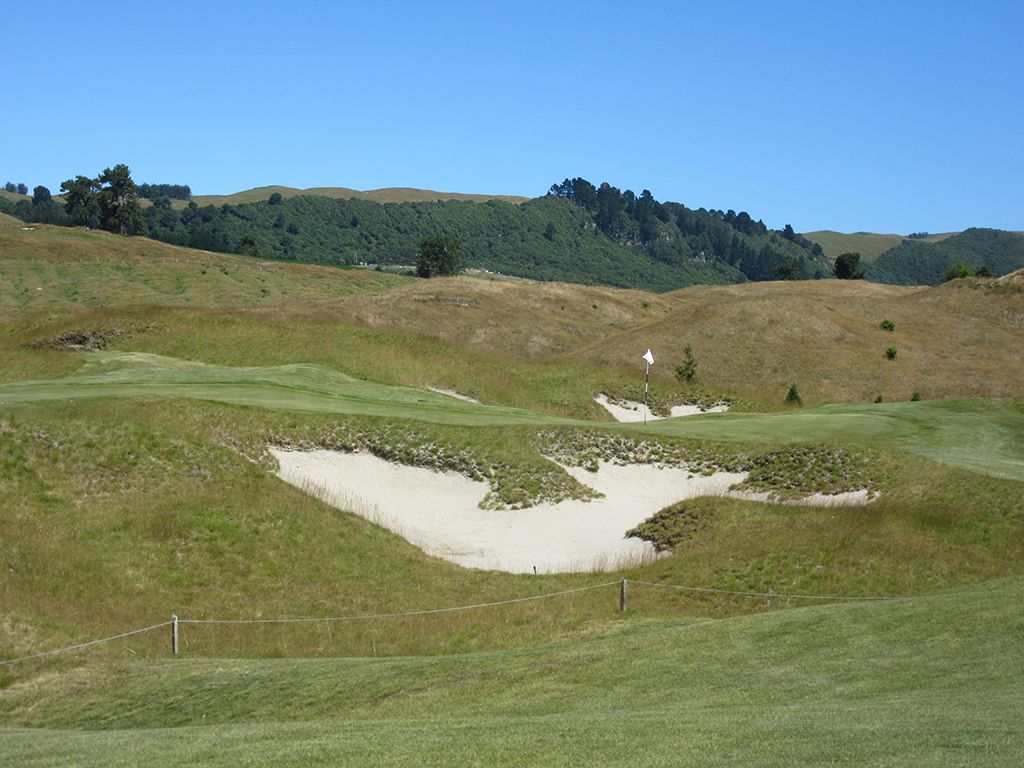
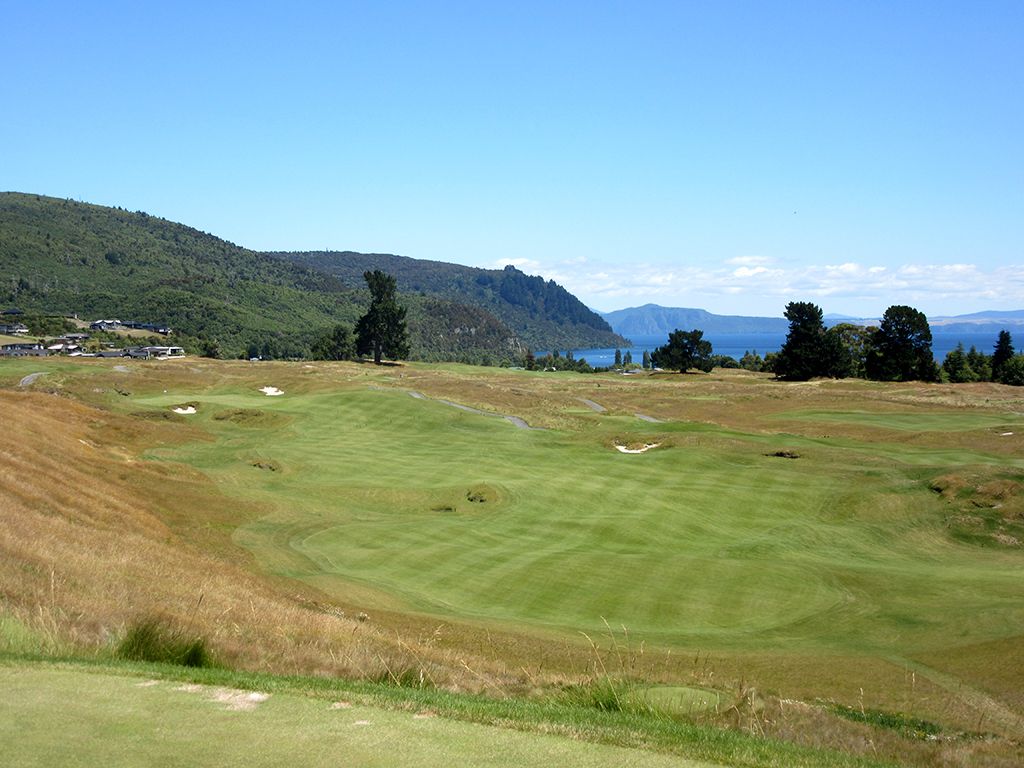
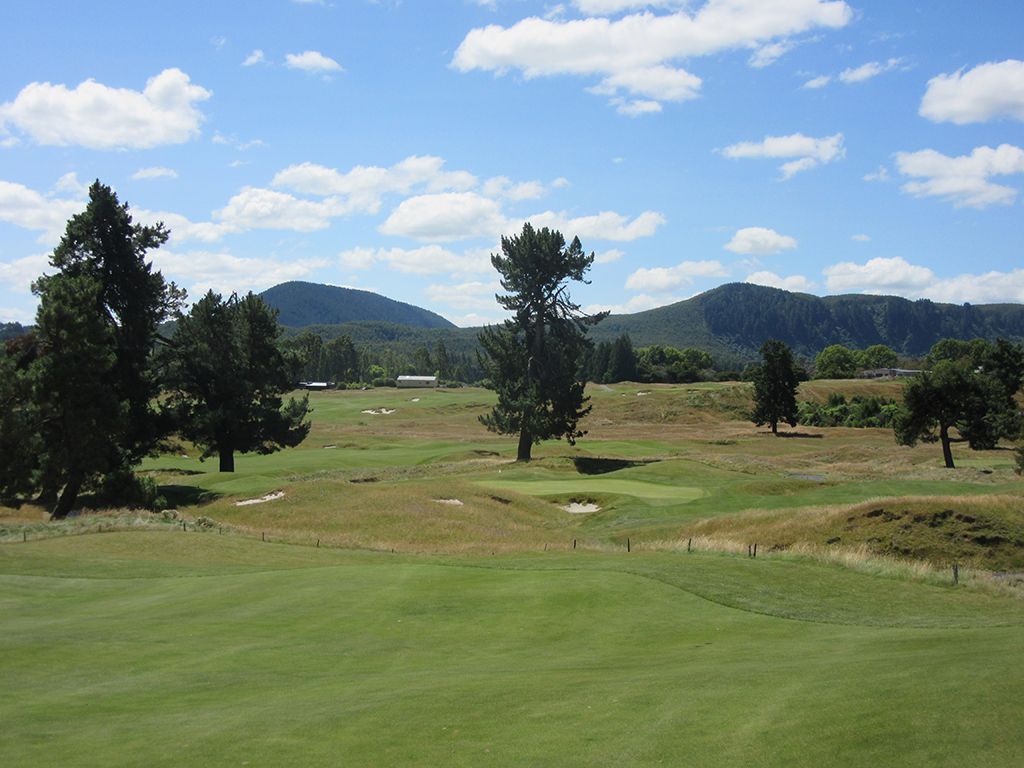
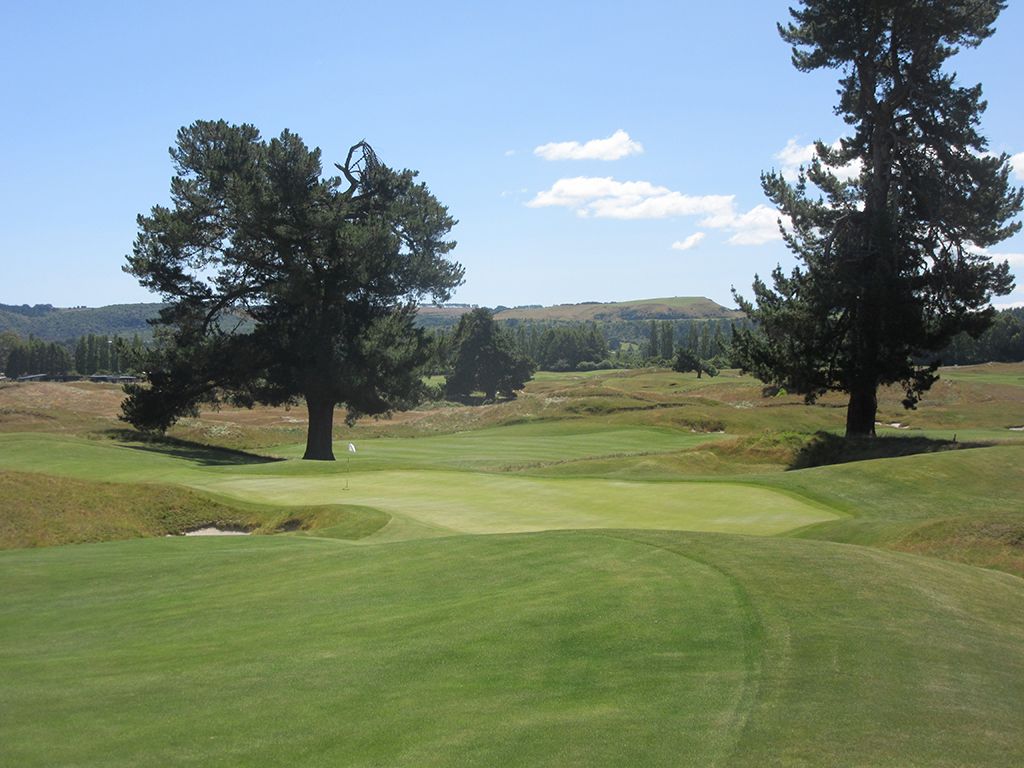
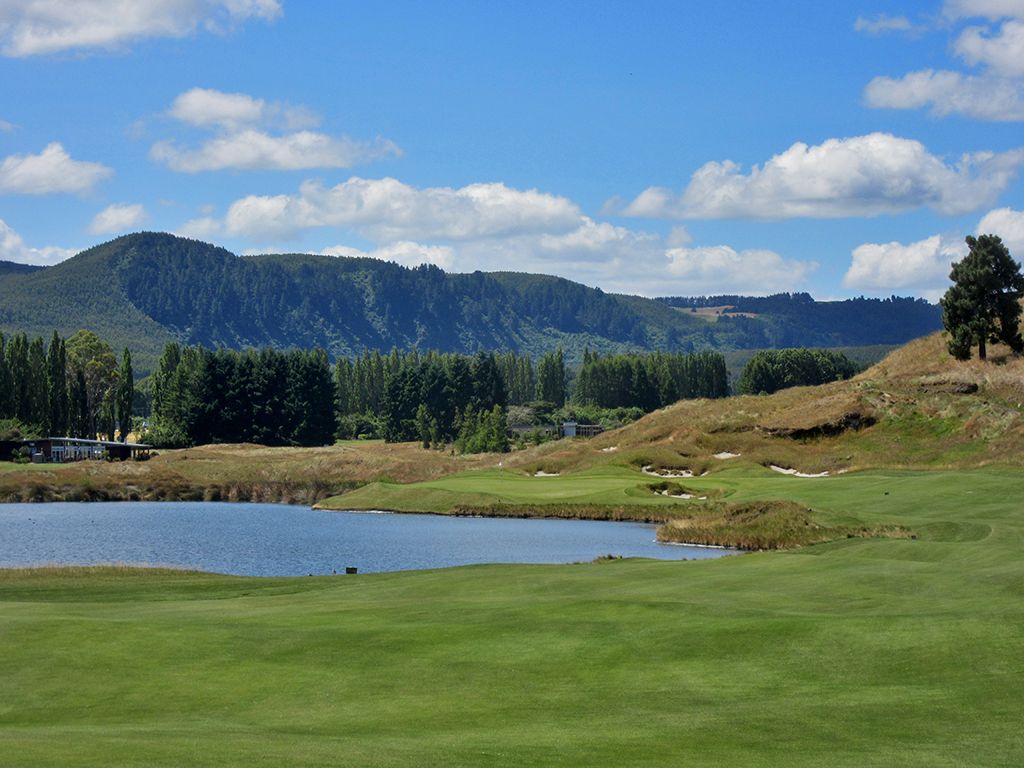
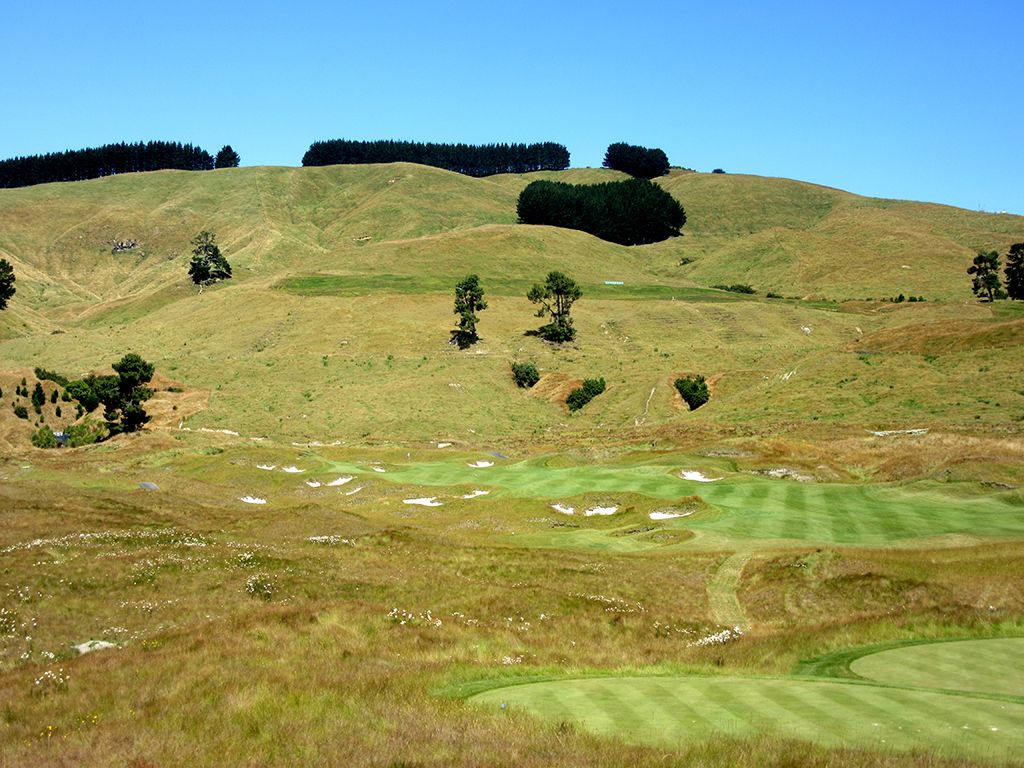
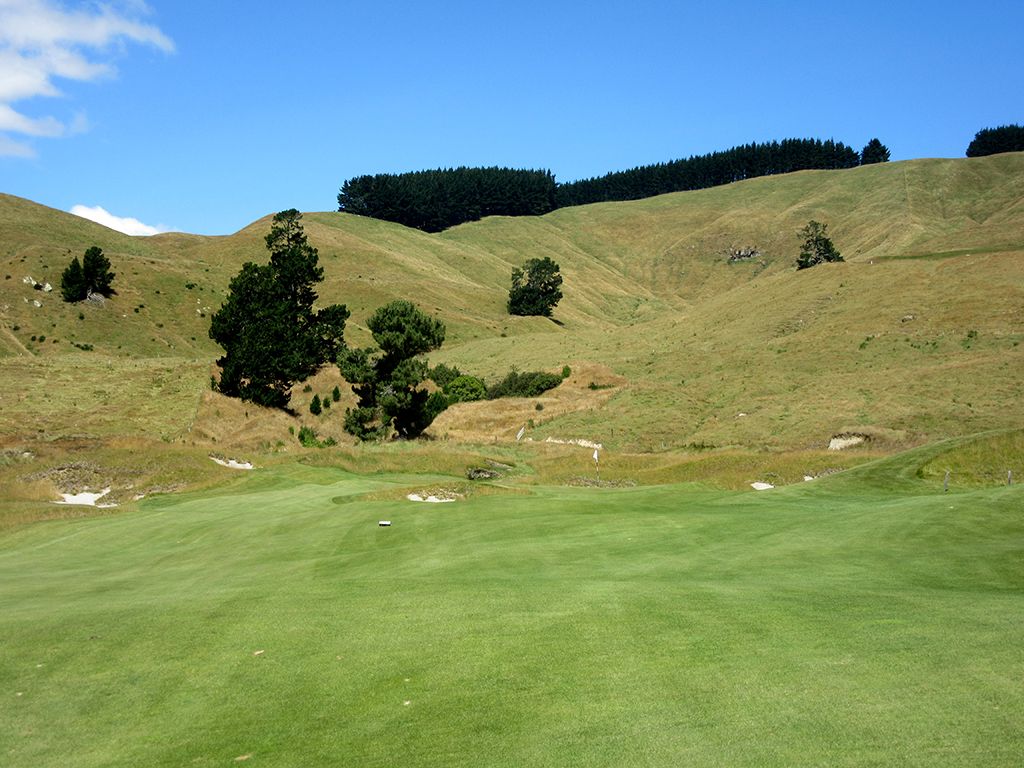
What to Expect: Applauded by many as one of Jack Nicklaus' finest designs, certainly outside the US, Kinloch is a visually stunning layout three hours south of Auckland on New Zealand's northern island. Eye candy is plentiful throughout the course with mountains framing the property around the front nine and Lake Taupo creating a gorgeous backdrop for the back nine. Despite not being on the sea, Kinloch has a links feel with heavy fescue framing the ribboning fairways that are as undulated as any you'll ever come across. From a variety perspective the hole shapes and directions are great and leave little wanting. On the flip side, Kinloch was finished shortly after Nicklaus' time co-designing Sebonack with Doak. After Sebonack, there was a clear change in Jack's approach to design in terms of bunkering and undulations. At Kinloch, the amount of challenge combined with the design features often feel over the top. There is a crazy amount of undulation in the fairways such that the only flat lie you'll ever have is on the tee box. When you combine that with firm, wildly undulated greens which are often only reached with a forced carry; the days can get long. The par threes are especially stout in terms of carry and reception while the 175 bunkers, while very attractively done, pepper the landscape more than any course not named Whistling Straits that I've been to. Speaking of American comparisons, the 9th hole reminded me of Tobacco Road's closing hole on the front nine where the large uphill climb to the putting surface will prevent the vast majority of patrons from ever realizing a green in regulation; especially with the length many will be approaching from. After your round you can enjoy the lodge facility that imitates a Scottish castle and is built to the highest standards of quality while offering expansive views across the golf course and Lake Taupo. In the end, Kinloch is a compelling experience with excellent variety in the hole designs and directions in a fascinating setting, but the penal nature of the course emphasized by severely undulated fairways and greens create an experience that would be difficult to enjoy everyday.
By the Numbers
| Tees | Par | Yardage | Rating | Slope |
|---|---|---|---|---|
| Black | 72 | 7364 | 77.4 | 139 |
| Blue | 72 | 6518 | 72.7 | 135 |
| White | 72 | 5721 | 67.8 | 119 |
| Red (Ladies) | 72 | 5074 | 71.6 | 125 |
Individual Hole Analysis
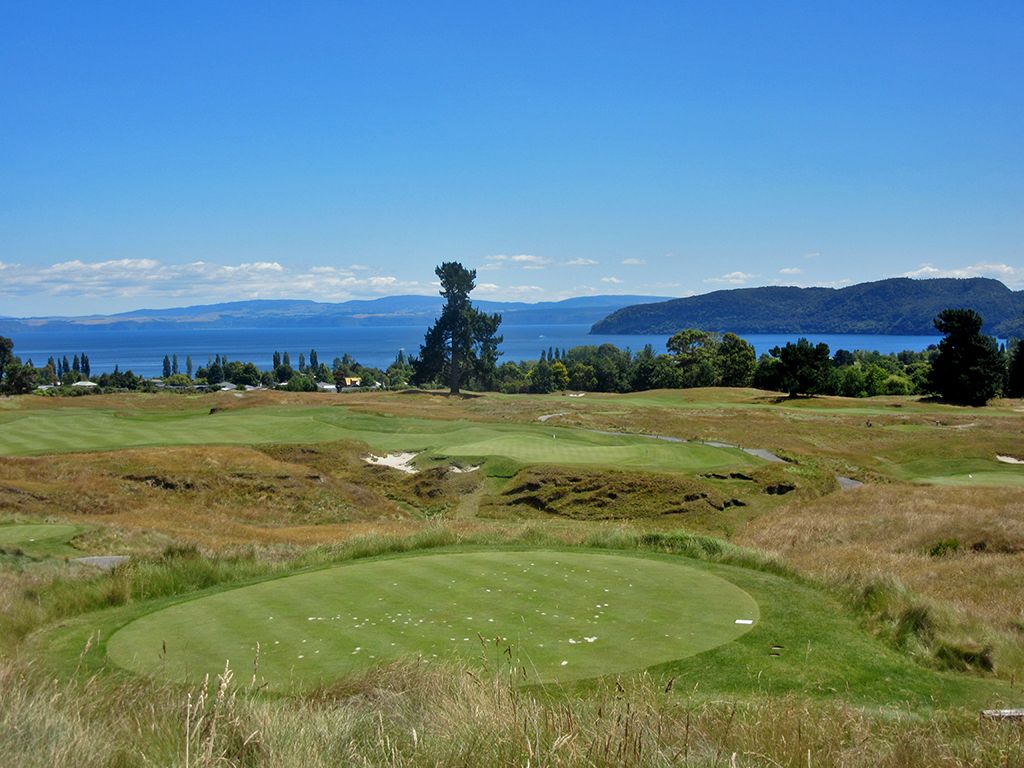
Signature Hole: 10th Hole – 472 Yard Par 4 – With an elevated tee and a panoramic view of Lake Taupo afforded in the distance, the back nine starts with the most impressive eye candy on the golf course. The dogleg left 10th creates the foreground as players pick an aiming spot left or right of the fairway bunkers on the near side and far side of the driving zone. The approach shot plays to a sloping green flanked on the left by deep bunkering and protecting the suppressed portion of the putting surface. A creative ground game shot that uses the front to back slope in the green to chase a ball back to a rear pin position can yield a most enjoyable result and shot be utilized if at all possible.
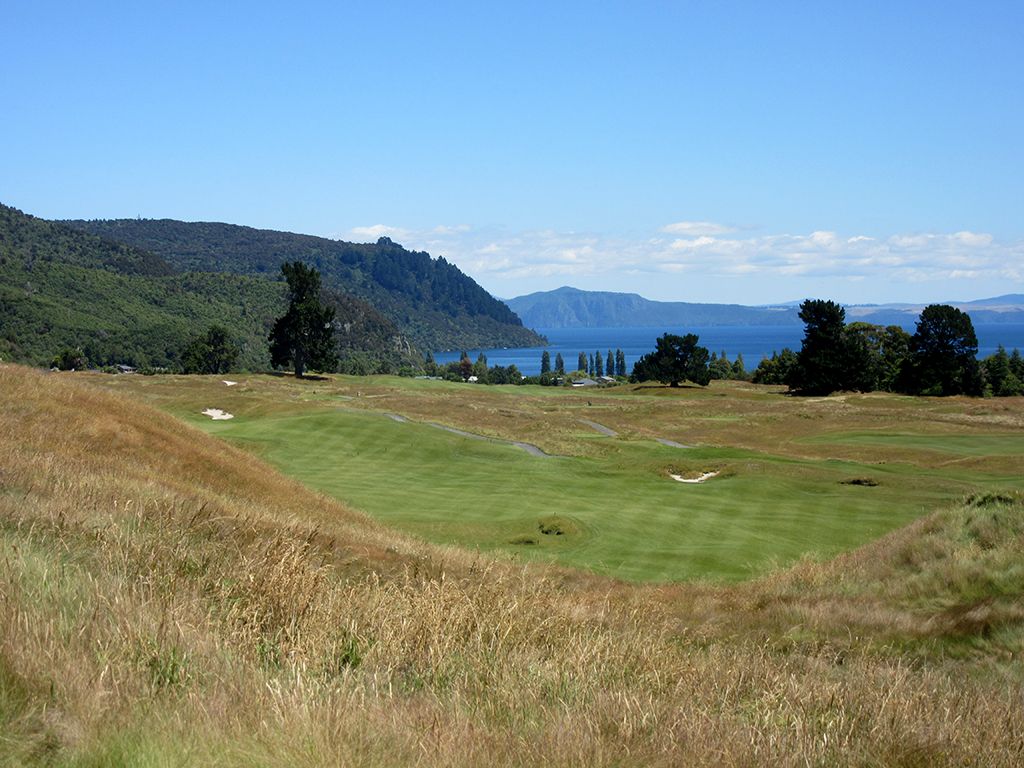
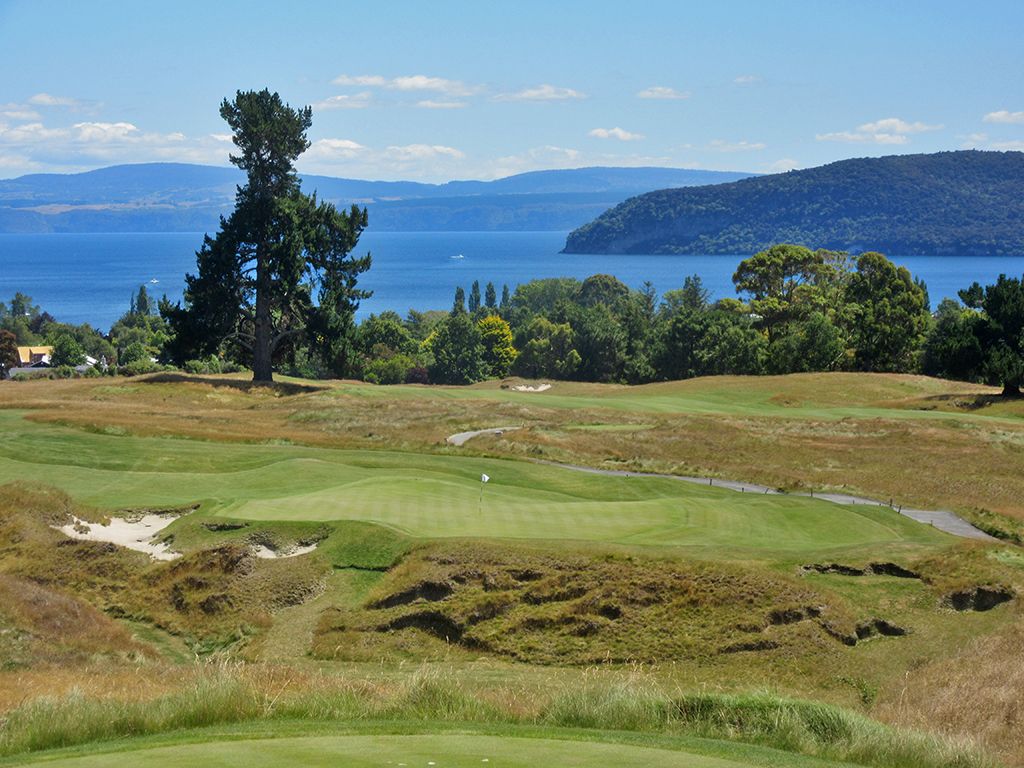
Best Par 3: 17th Hole – 200 Yards – The final one-shotter at Kinloch is a stunning offering that plays downhill to a wide green fronted by scraggly deep grass in front, a large bunker on the left, and a jaw dropping view of Lake Taupo in the distance behind. There isn’t a good miss here and the undulated putting surface is a one more test of your short game down the stretch. Soak in the setting and then make one of your best iron swings of the day, you are going to need it.
Best Par 4: 6th Hole – 385 Yards – Options, options, options; it is why I love buffets and something I love to see factored into a hole design. The 6th offers a clear decision off the tee; hit a sub-250 yard tee shot to the undulated and sloping fairway to the right or take your chances ripping one at the green. The conservative play to the right leaves a generous landing area but almost assuredly a downhill slanting lie to a wide, but narrow, green that is fronted by a bunker. Going at the green requires a carry of nearly 300 yards to clear the trio of bunkers protecting the small fairway and green entrance afforded on that line. Both options come with their pros and cons, so be smart on what you do, and more importantly have fun doing it!

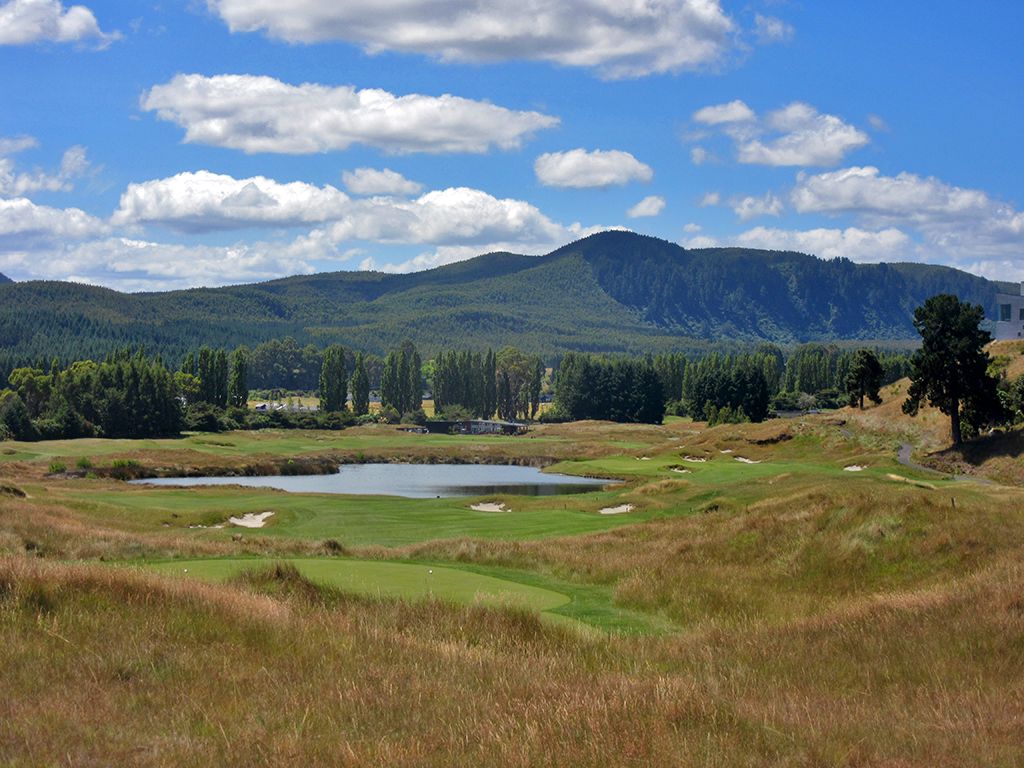
Best Par 5: 18th Hole – 572 Yards – This is a great finishing hole and certainly among the best closers in New Zealand. The tee shot plays straight away to a fairway featuring three bunkers on the edges of the landing zone. Successfully navigating to the short grass could set up an opportunity to reach the green in two though players have to guard against a hook as water flanks the left side the final 175 yards of the hole. Players looking to layup can utilize the pot bunker on the right side of the fairway 75 yards from the green as an aiming point and then it is 15 yards short to have a perfect spot in the fairway to attack the flag from. A small bunker front the green and should mostly be a factor when players are trying to reach the green in two, but it can also be a trap to players getting greedy on a front left pin placement. With the area left of the green falling off sharply to the water, you don't want to flirt with the trouble on that side and go out on a poor note. Just find the middle of the green and try to walk away with a birdie.
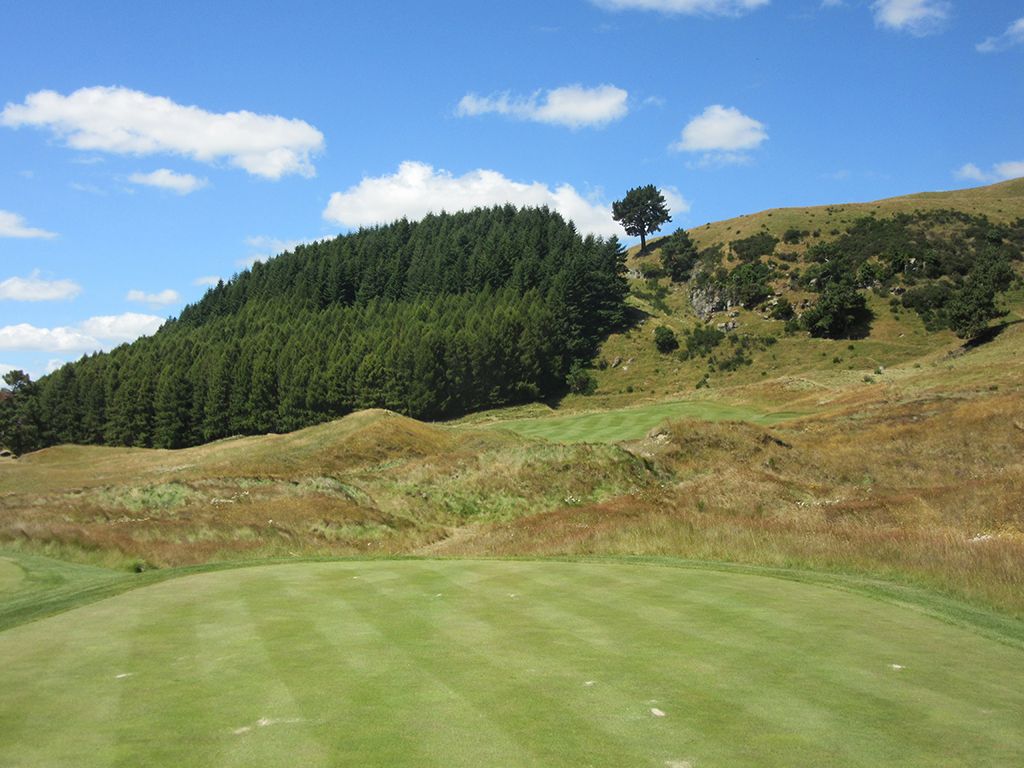
Birdie Time: 5th Hole – 364 Yard Par 4 – The hole that is photographed and featured more than any other at Kinloch, the attractive 5th is a baby dogleg left that plays toward the towering hillside in the background. The long grass framing the fairway with its golden tone gives a fescue appearance and a links feeling complemented by over a dozen scraggly bunkers scattered throughout the hole. The visual of seeing your tee ball fly towards the fairway with the mountain backdrop is perhaps the most inspiring view your eyes will take in during the day and the shortness of the hole could extend the smile on your face if you card a birdie. A good drive will leave a wedge shot into the green and a chance to stick it close, so be aggressive here and get a stroke back from Old Man Par.
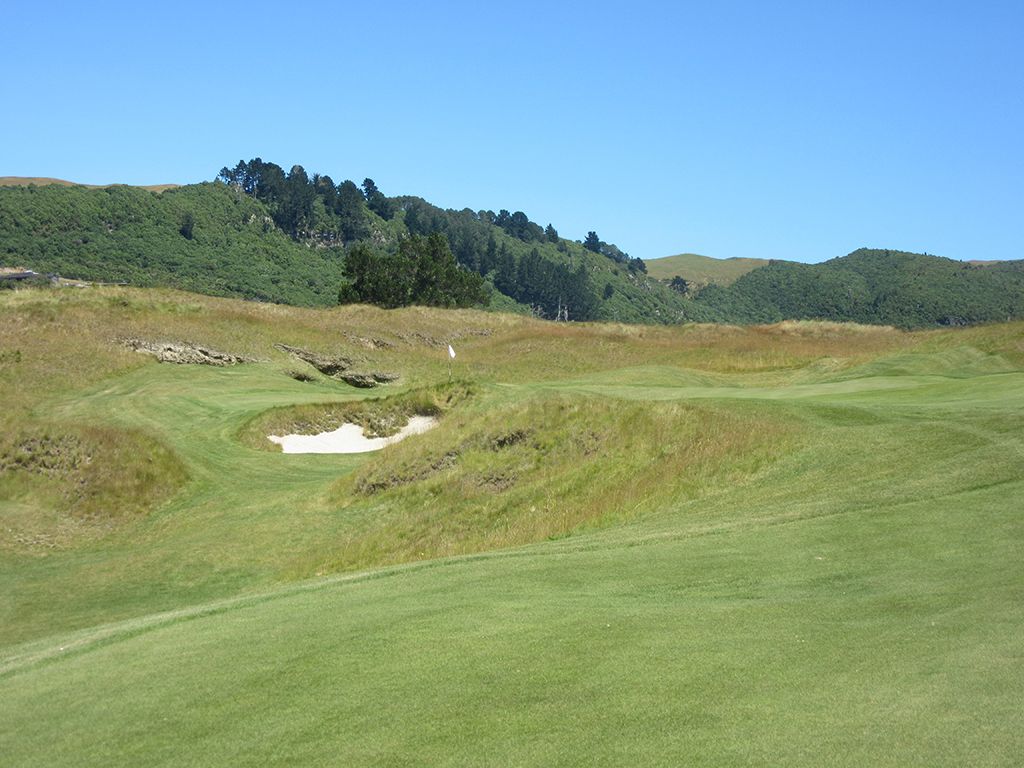
Bogey Beware: 4th Hole – 497 Yard Par 4 – This hole is brutal. At nearly 500 yards from the tips, length is already a major challenge but when you factor in a forced carry off the tee and on the approach shot, eight bunkers including three right around the putting surface, and a lumpy fairway to deal with, it borders on cruel and unusual. A 270 yard tee shot up the left half of the fairway will tumble into a large bunker which will all but eliminate your chance of reaching the green in regulation. Tee shots up the right will have more short grass to work with but if you play too conservatively to the right you will have a large pine tree to contend with when considering your approach shot. The forced carry into the firm green is extremely difficult to get to hold unless you can start your ball left and cut it into the opening of the green afforded on that angle. Not only is a bogey a good score here, a double is nothing to be too ashamed of.