 Golf Course Review by: Billy Satterfield
Rankings:


The Takeaway: Trumped perhaps only by Cypress Point as Alister MacKenzie’s most impressive property to work on, New South Wales is simply one of the finest golf courses and clubs in the world. MacKenzie utilized the natural terrain to unveil compelling holes at every turn that constantly has you craving for more. The stunning location and masterful routing make New South Wales a course I could play the rest of my life and die happy. Grade A+
Quick Facts
Designer: Alister MacKenzie in 1928
Cost: Private $225 AUD - $450 AUD Click for membership information
Phone Number: +61 2 9661 4455
Course Website: Official Website - Visit New South Wales Golf Club's official website by clicking on the link provided.
Directions: Get here! - 1528 Anzac Parade, La Perouse, New South Wales 2036 – AUSTRALIA
Photos: See additional photos of New South Wales Golf Club
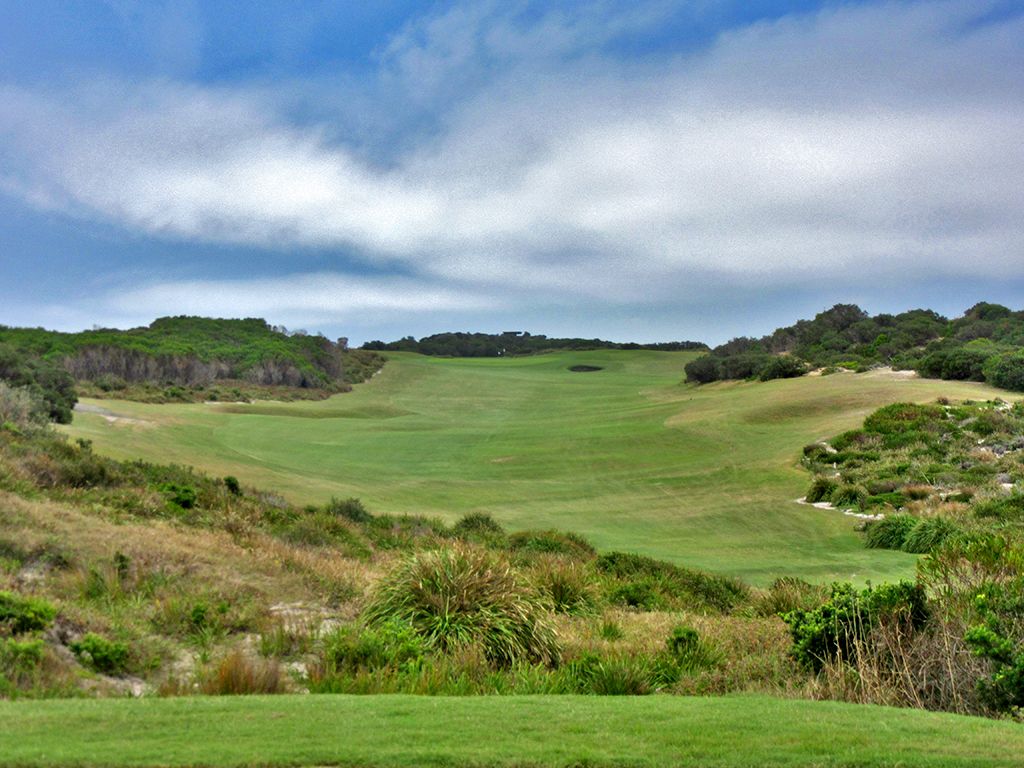
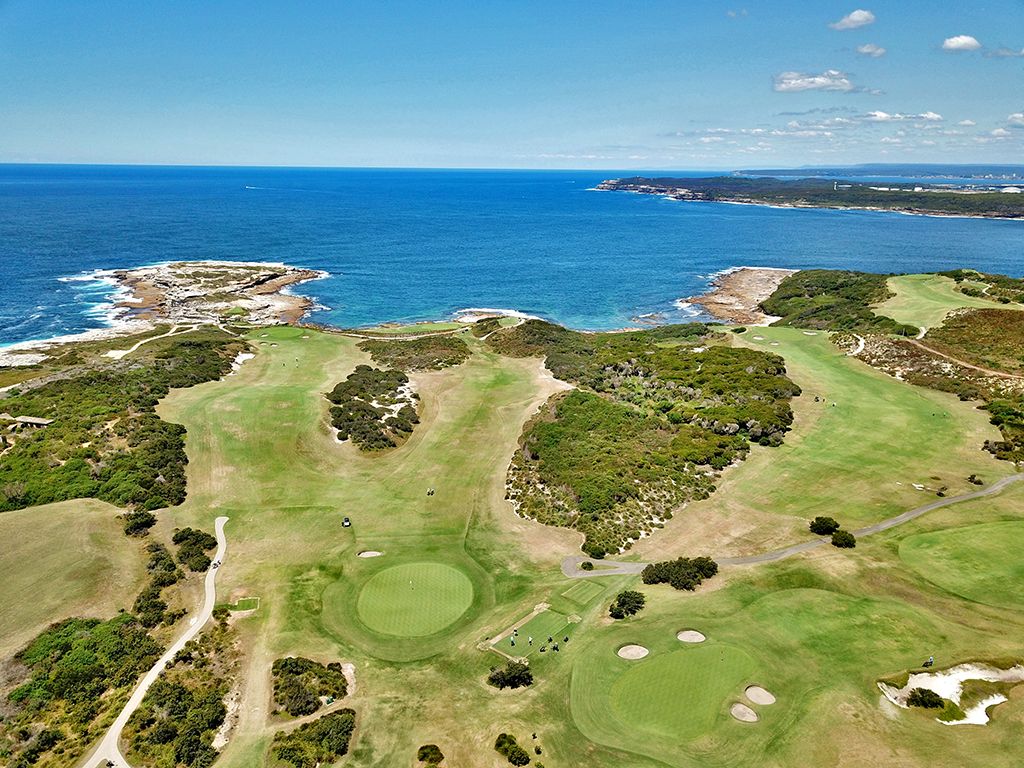
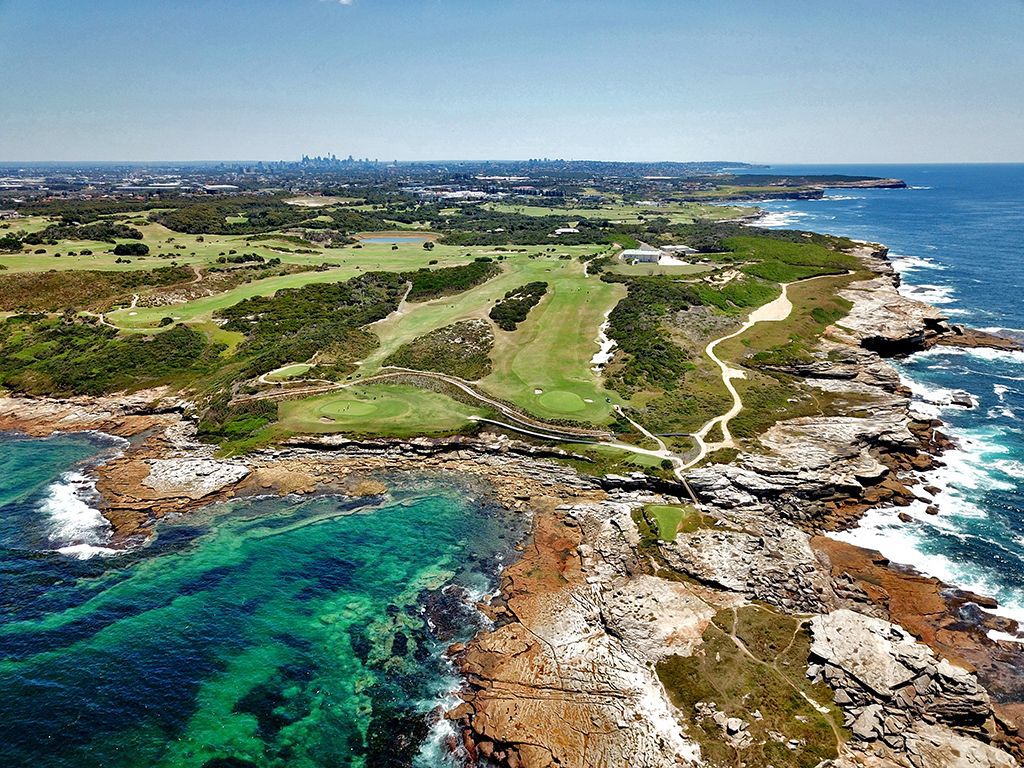
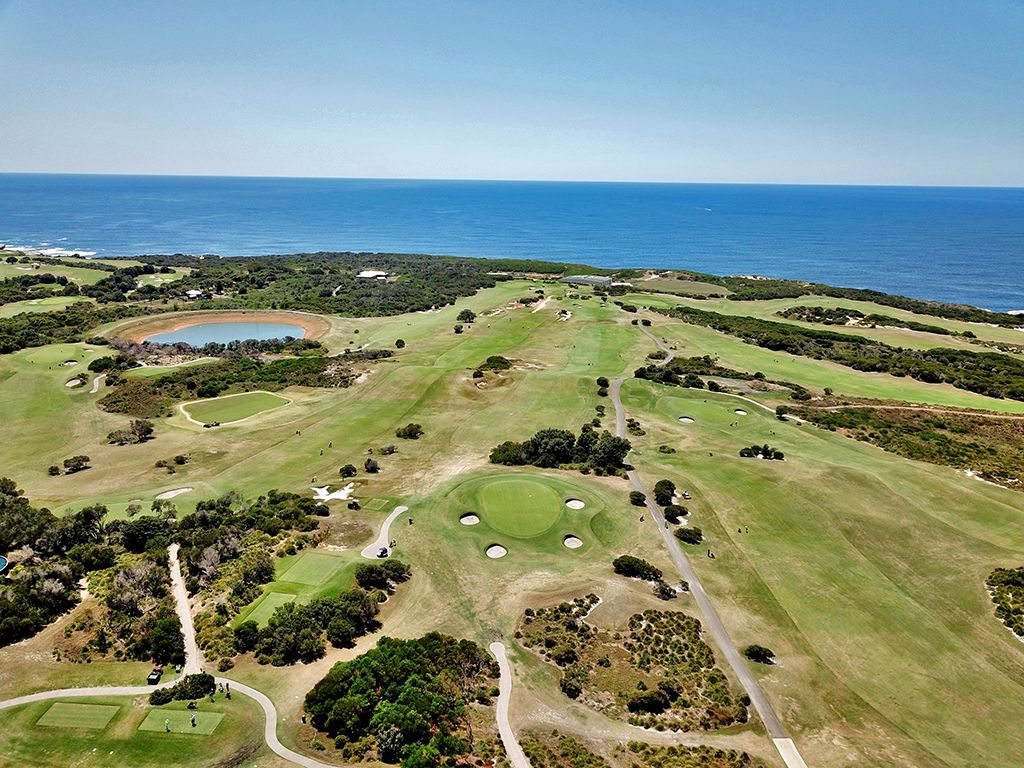
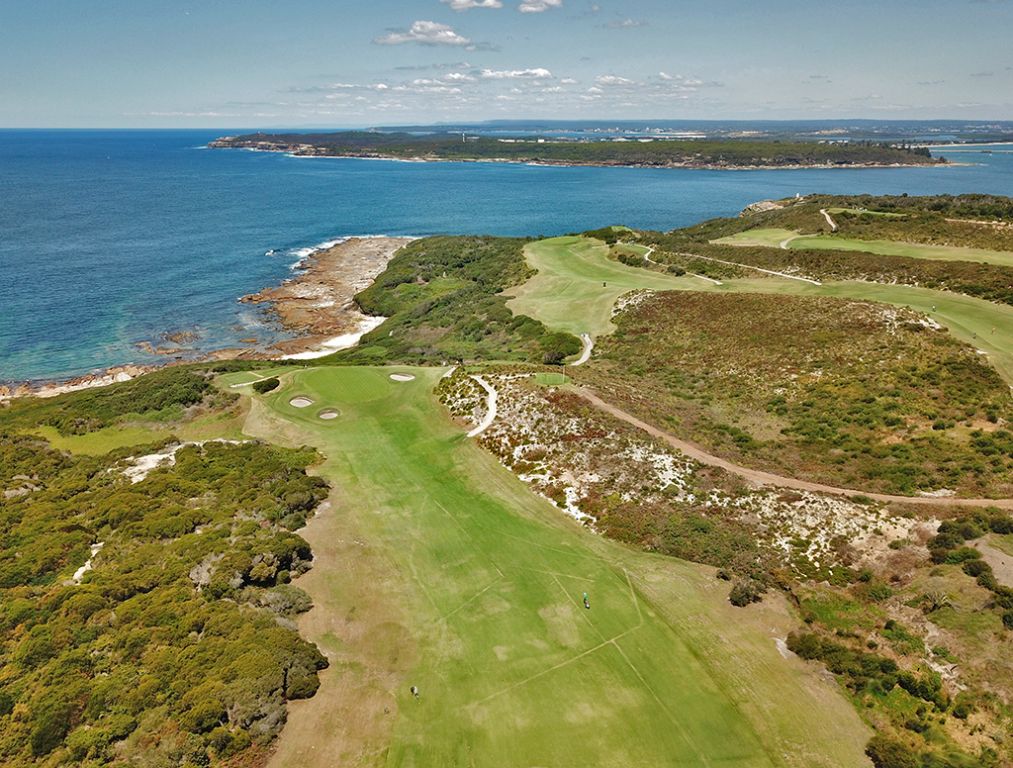
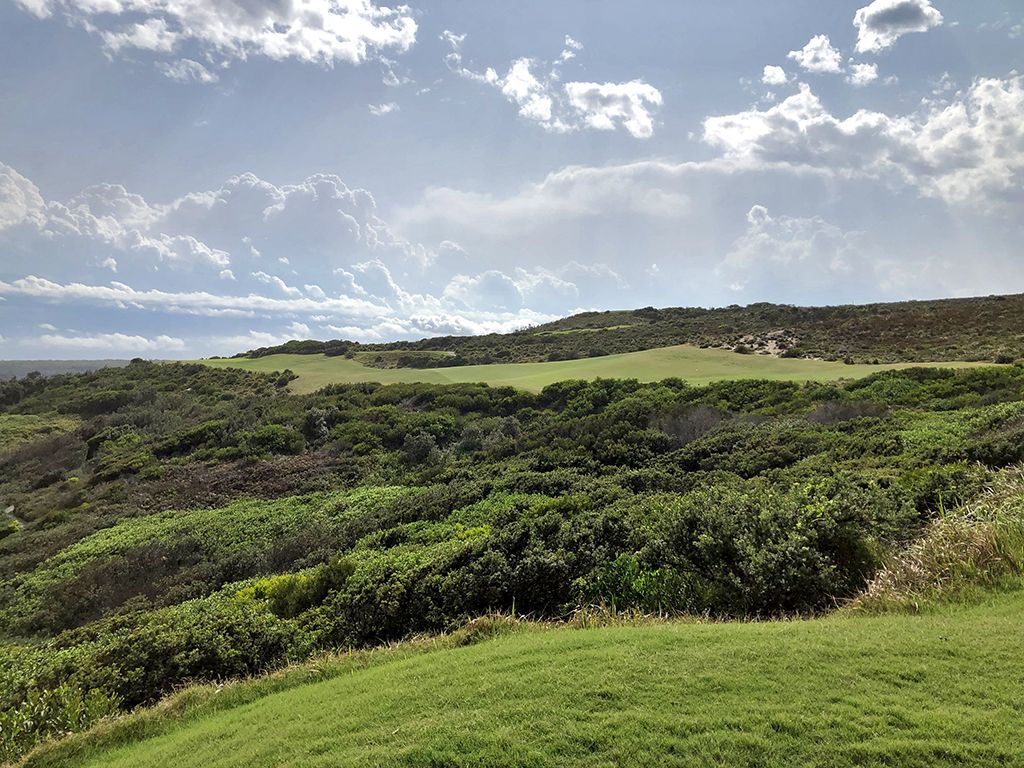
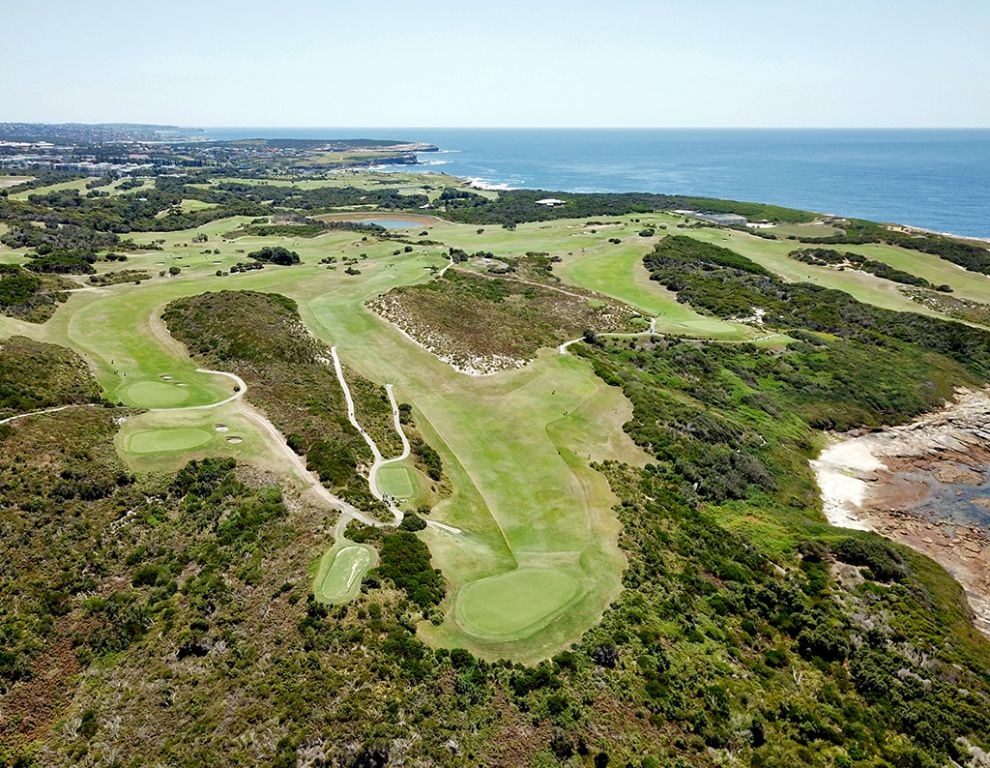
What to Expect: Perhaps only Alister MacKenzie has consistently been able to design golf courses that seductively draw you in and mesmerize you throughout the round in a way that no other architect can. Their universal appeal can be accredited to the Good Doctor’s thoughtful green complexes, compelling routings, and attractive bunkering, but ultimately making the course enjoyable to play over the natural terrain is where MacKenzie’s genius shines through. New South Wales is a beautiful example of this both in terms of a choice piece of property and Alister’s ability to maximize it with holes that consistently reel the golfer in like a champion angler. The course begins with a gentle opening by offering a short two-shotter for players to get warmed up on. A slightly downhill par three awaits next before the character at NSW kicks in strong with a blind hard dogleg left par four that first timers will be shocked how far left they can hit their ball and still find the fairway. The 5th and 6th holes are what NSW is so well known for with one of the finest back-to-back hole combinations in the world in what has to be classified as one of golf’s Mona Lisa locations on the La Perouse coast. Perched out into the Pacific Ocean, the green at the par five 5th followed by the coastal par three 6th are absolutely mesmerizing. The course eventually finishes on a fantastic six hole stretch that starts with a pair of doglegs that work their way to the sea and finishes with a par five below the clubhouse. Variety in the directions that the holes run is masterful and allows for a unique and enjoyable experience no matter what way the wind is blowing on any given day. The gently moving terrain is perfect for golf and is routed such that it can be well enjoyed by walking though plenty of players will elect to take a cart. Ultimately, some courses are fun to experience on occasion, but would be laborious to consider playing on a daily basis. When it comes to New South Wales however, I could play it everyday the rest of my life and be thoroughly satisfied. New South Wales, Royal Melbourne, Cypress Point, and Lahinch are examples of Dr. MacKenzie’s brilliant work that seduces players with crafty architecture while never making them feel overpowered; a most delightful combination indeed.
By the Numbers
| Tees | Par | Yardage | Rating | Slope |
|---|---|---|---|---|
| Championship (Blue) | 72 | 6830 | 73.7 | 135 |
| White | 72 | 6505 | 72.2 | 132 |
| Gold/Red | 75 | 6052 | 71.2 | 127 |
| Red (Ladies) | 75 | 6052 | 77.0 | 140 |
Individual Hole Analysis
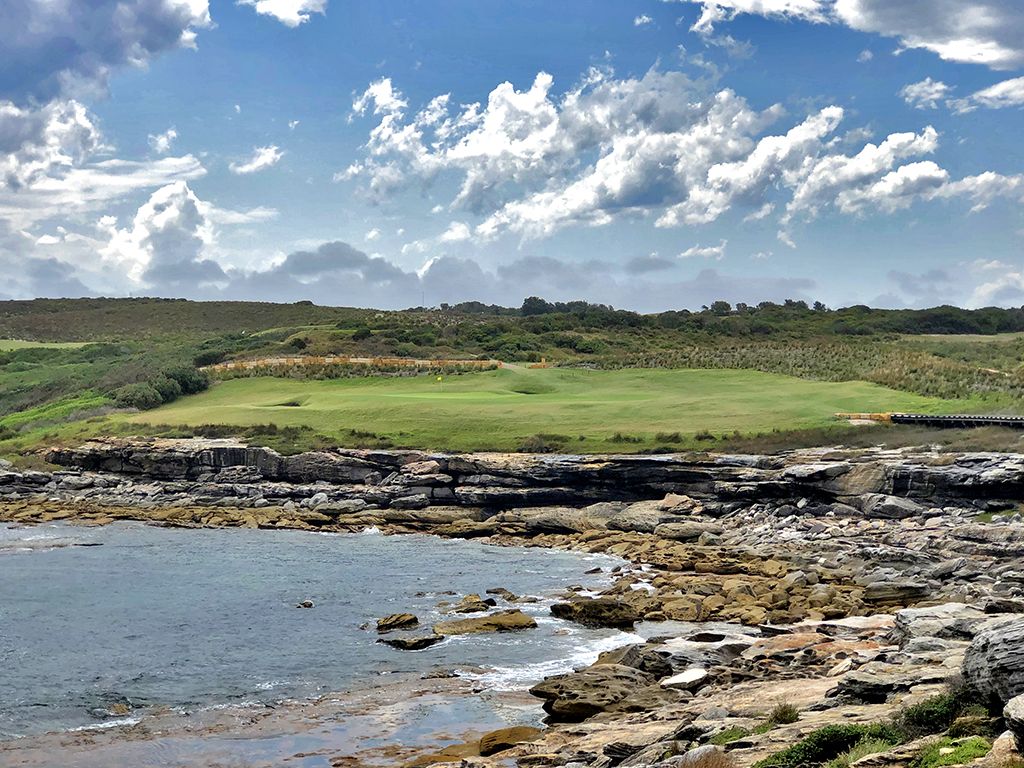
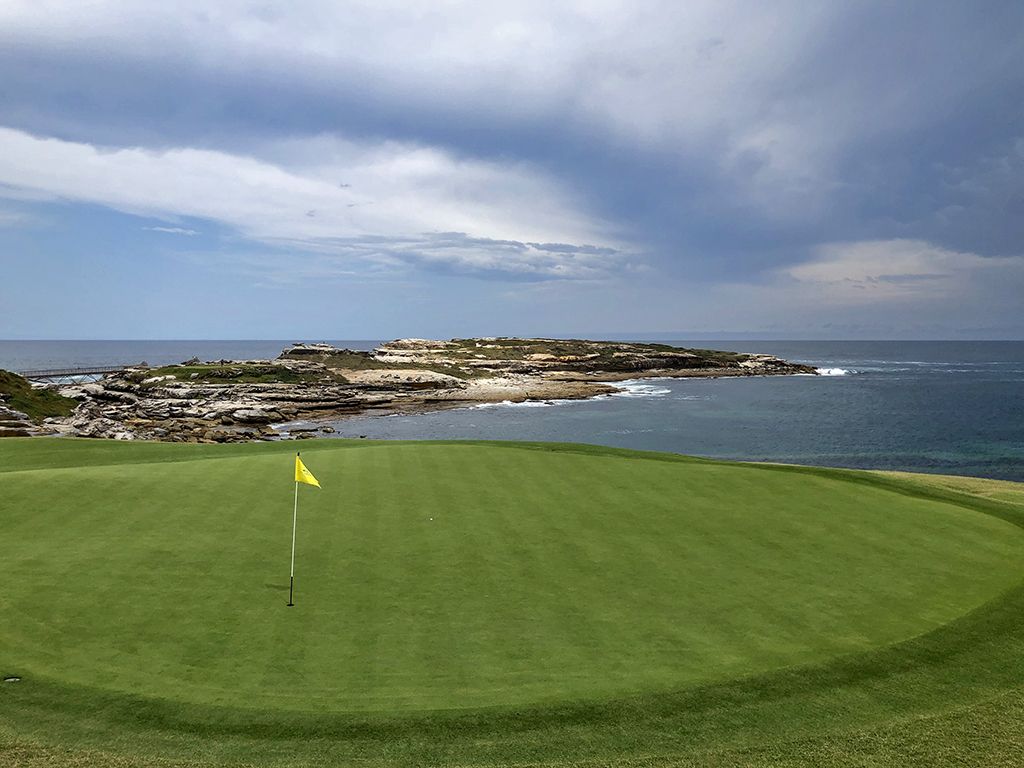
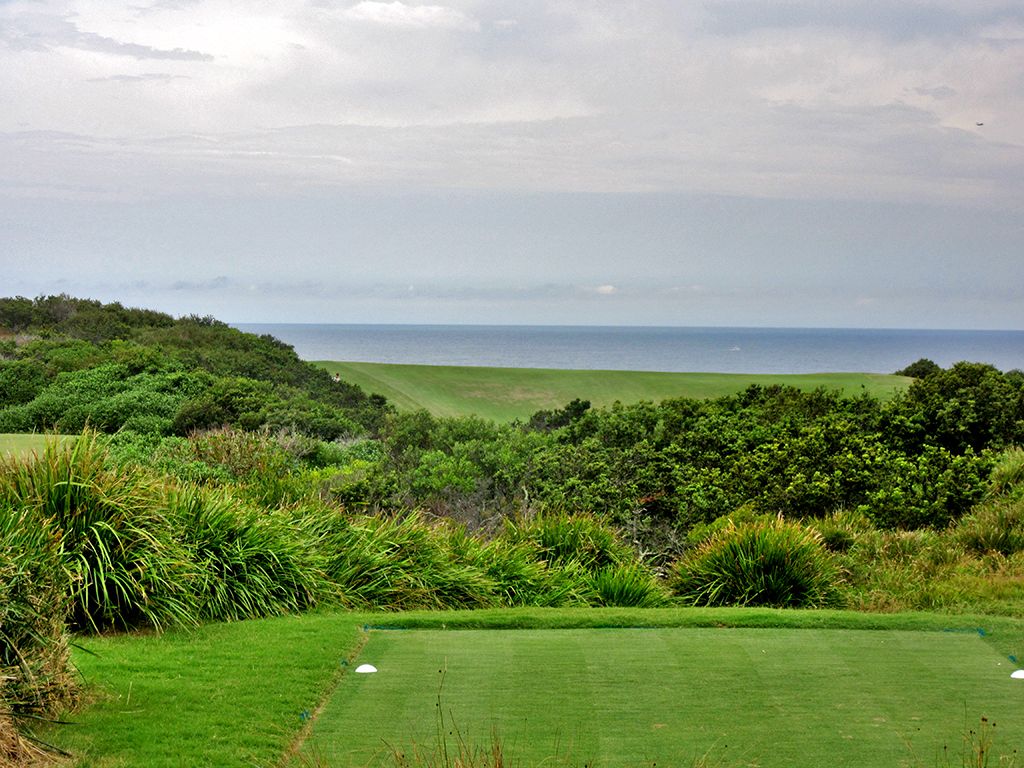
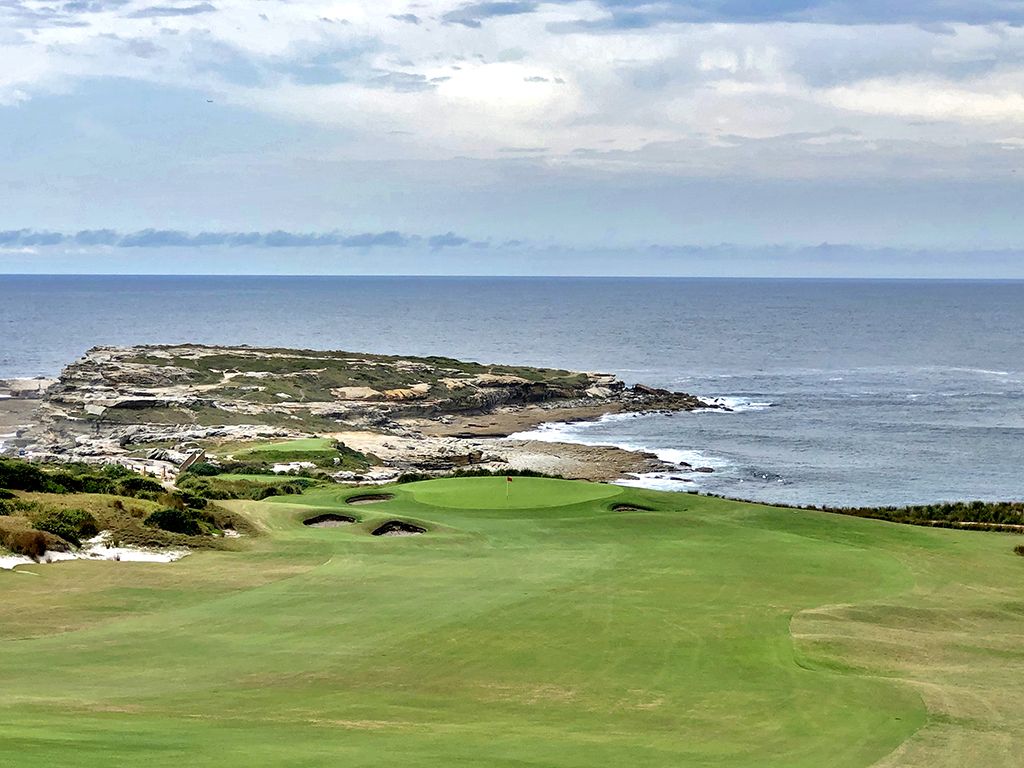
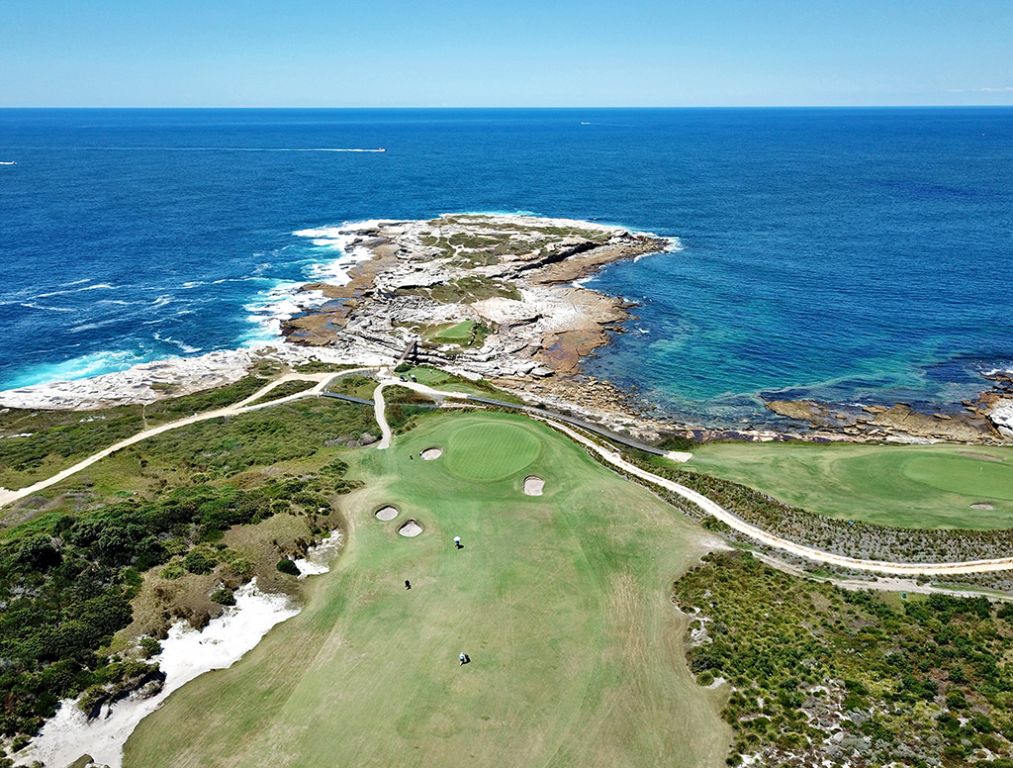
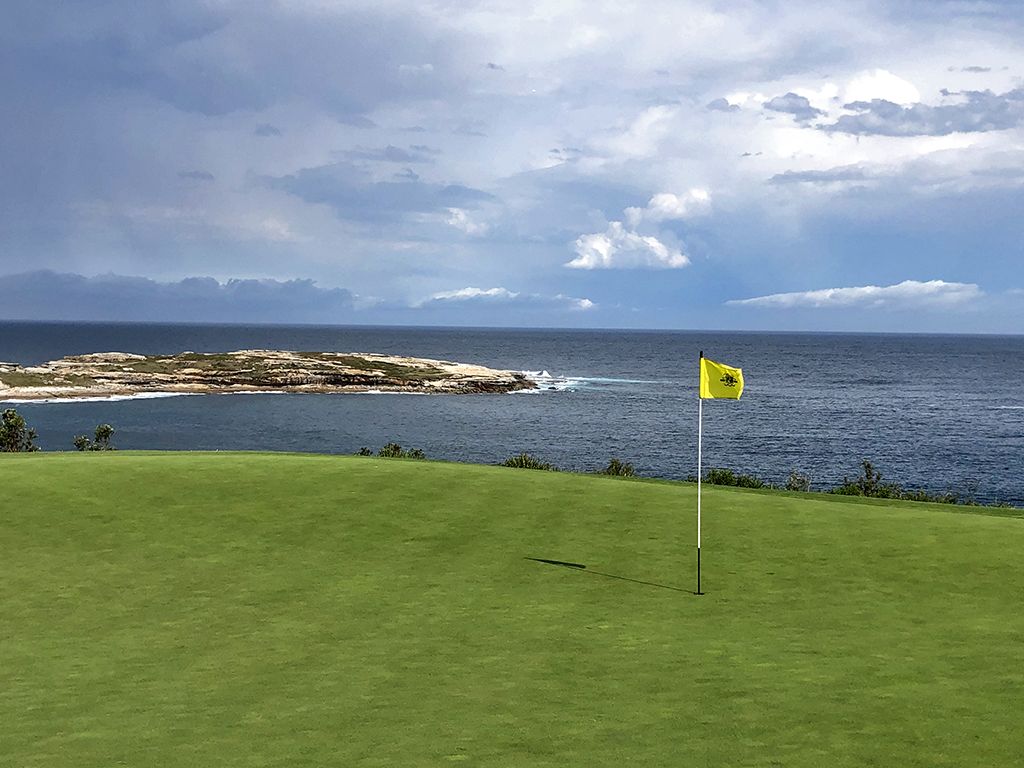
Signature Hole: 6th Hole – 202 Yard Par 3 – Few sites rival where the all-world 6th hole tee is perched at the tip of a peninsula with the Pacific Ocean virtually surrounding the player. The tee shot plays over a small saltwater cove with ledgestone rocks further complementing the artistic setting that is so alluring it will seduce every player that graces it. Kidney shaped bunkers frame each side of the green and sit in a horseshoe shaped depression that wraps around the putting surface while leaving a flat spot out front where balls can be bounced in from. Take a moment to focus long enough to hit a solid tee shot, then take a longer moment to soak in just how incredible it is to be at New South Wales in one of golf’s finest settings.
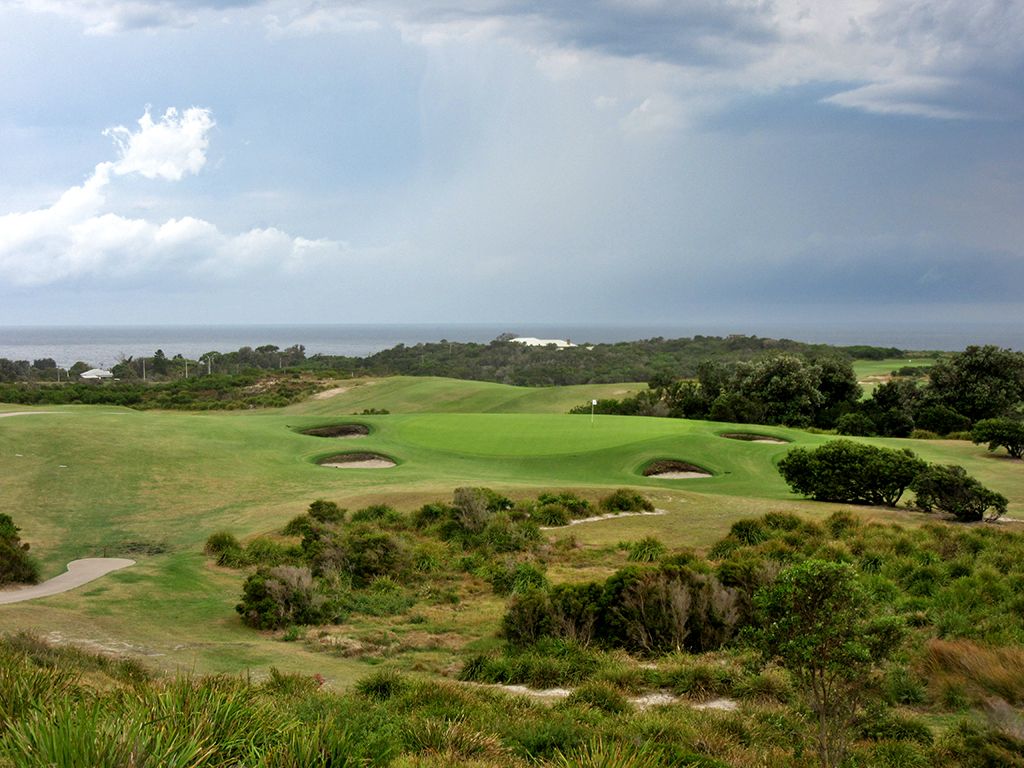
Best Par 3: 11th Hole – 163 Yards – The four circular bunkers that systematically surround the green instantly grab the golfer's attention as they stand on the tee of the short 11th. The domed putting surface features the steepest falloffs on the front and rear portions with the front channeling balls toward the bunker short right. The smart play is a shot at the middle of the green no matter where the pin is at and then taking your chances with the flatstick from there. From the slightly elevated tee box, players are afforded a comforting view of the ocean in the distance; a view that never gets old.
Best Par 4: 13th Hole – 410 Yards – The first of back-to-back dogleg left two-shotters, the 13th is a beautifully sweeping hole that traverses toward Cruwee Cove. A 250 yard tee shot straight away will go too far to stay in the fairway so you'll need to hit something less than driver on that line or challenge the corner of the dogleg with a driver over the brush in an effort to receive the reward that awaits the bold. The bunkerless fairway is devoid of a mark that players can use as a specific aiming point, but once safely in the fairway the approach shot plays to a green protected by a trio of bunkers. The putting surface is fronted by a valley that creates a chipping bowl while the bunker on the right side sits well above the pair on the left. An exacting second shot is required with trouble resulting in every miss found around the green, but the inspiring ocean background should calm the nerves before pulling the trigger. It is a beautiful hole that is equally testing.
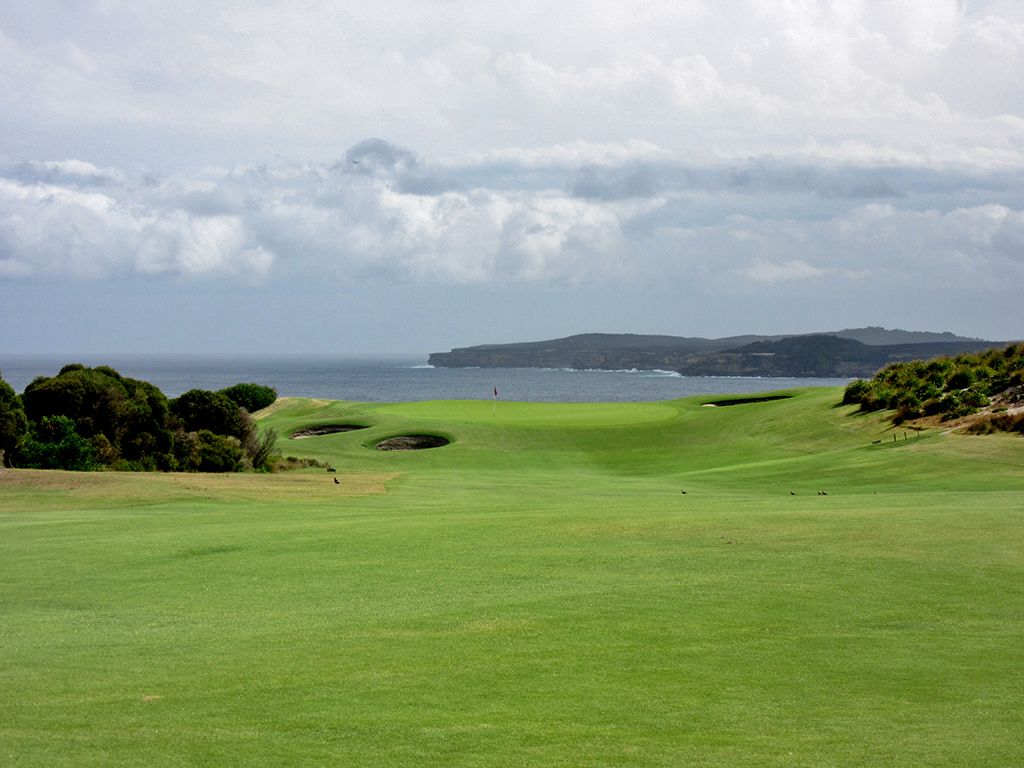
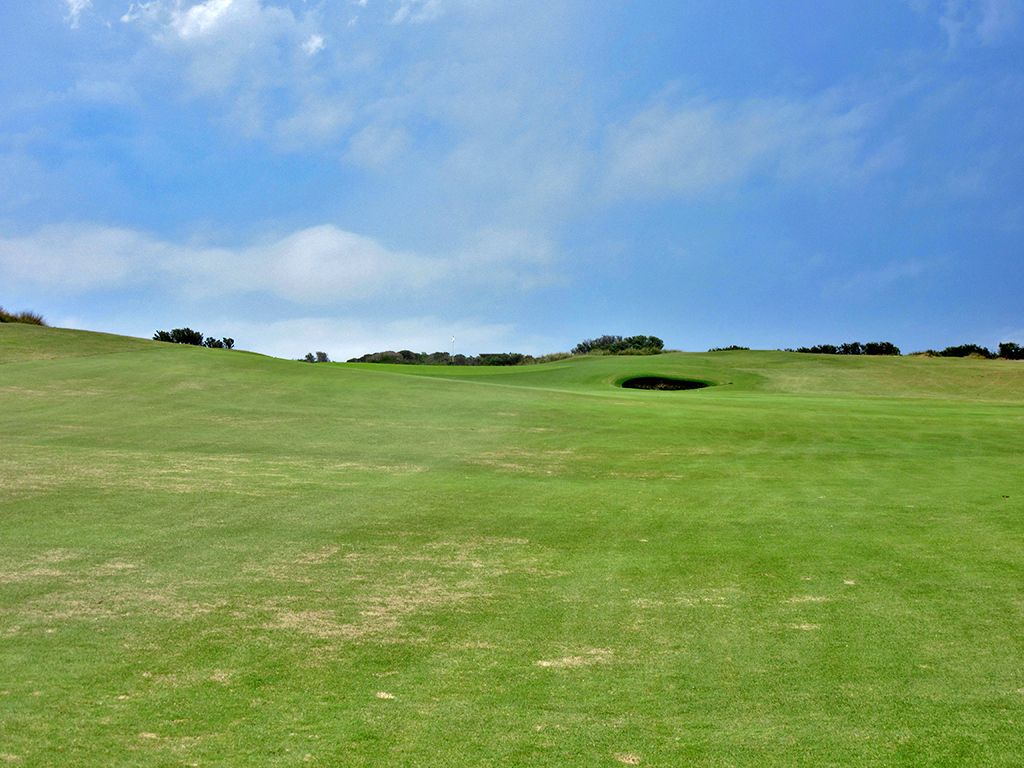
Best Par 5: 5th Hole – 512 Yards – Three of the four par fives at New South Wales Golf Club feature a sizable rise in the fairway that creates a hill across the short grass which effectively results in a speed slide on the backside. Tee shots that carry the hill will be richly rewarded with as much as 50 yards of roll as they tumble closer to the green and set up easier opportunities to reach them in two, but never is that situation more rewarding then at the 5th hole. From the tee, players can clearly see the hill they want to crest which becomes relatively easy to reach downwind and quite another feat into a stiff ocean breeze. Whether you eclipse the summit with your tee shot or whether it is with your second swing, the view that awaits on the other side is one of the most iconic scenes in golf with a spectacular visual of the fairway and green in the foreground while rocks and the Pacific Ocean create a mesmerizing background. Tee shots that carry the hill can have a wedge or short iron into the green and create an excellent opportunity to card a birdie, or even an eagle, so getting off the box effectively is critical here. This hole is without a doubt one of the most enjoyable and beautiful par fives in the Southern Hemisphere and worth the price of admission on its own.

Birdie Time: 14th Hole – 353 Yard Par 4 – Oh the options, risks, and rewards that await on the 13th! On a direct line with the green, players that carry their tee ball 300 yards will land just short of the putting surface before bouncing onto the green to yield an eagle putt. Tee shots aimed at the 15th tee in the distance require less carry before sailing over safe ground and is the line most players should take. The result should leave players with a short chip from an undulated fairway to a green that is much flatter than one might expect given the wild terrain leading up to it. The ultra is safe lines is a 210 tee ball aimed at the saddle in the fairway where the short grass of the 14th and 15th holes converge, and still leaves just a short iron into the green. The enjoyment of playing the risk/reward scenarios on the 14th are contagious and create one of the most anticipated moments to engage in at New South Wales.
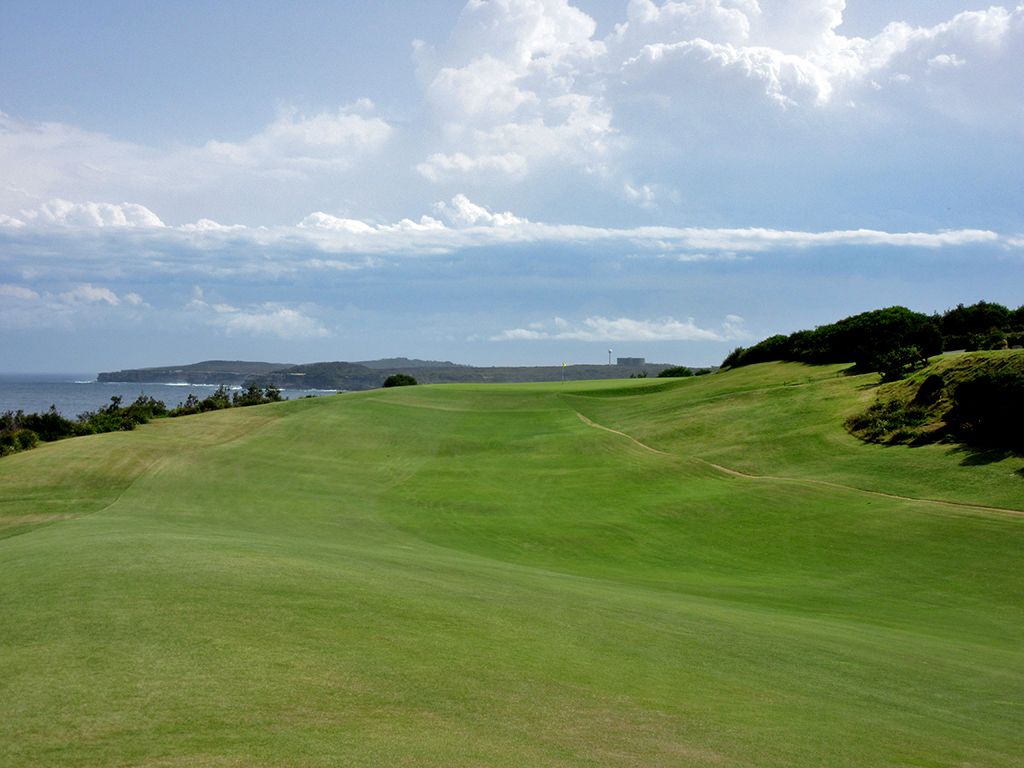
Bogey Beware: 7th Hole – 411 Yard Par 4 – The completion of New South Wales’ world famous three hole stretch is also the course’s most difficult hole. The fairway steadily climbs uphill the entire way to the green as the hole traverses away from the ocean straight inland. Thick foliage frames each side of the fairway, so tee shots that waiver off line will likely be lost, or at a minimum, virtually eliminate any chance of saving par. The approach shot plays at least an extra club more than the distance indicates while the false front is quick to repel shots that come up wanting, so every effort should be made to get the ball well onto the green. The only bunker on the hole is short right of the green where weak approach shots will be punished as extra insult to the injury of a bruised ego. Hopefully you made birdie on #5 to help compensate for the likely bogey awaiting on #7.