 Golf Course Review by: Billy Satterfield
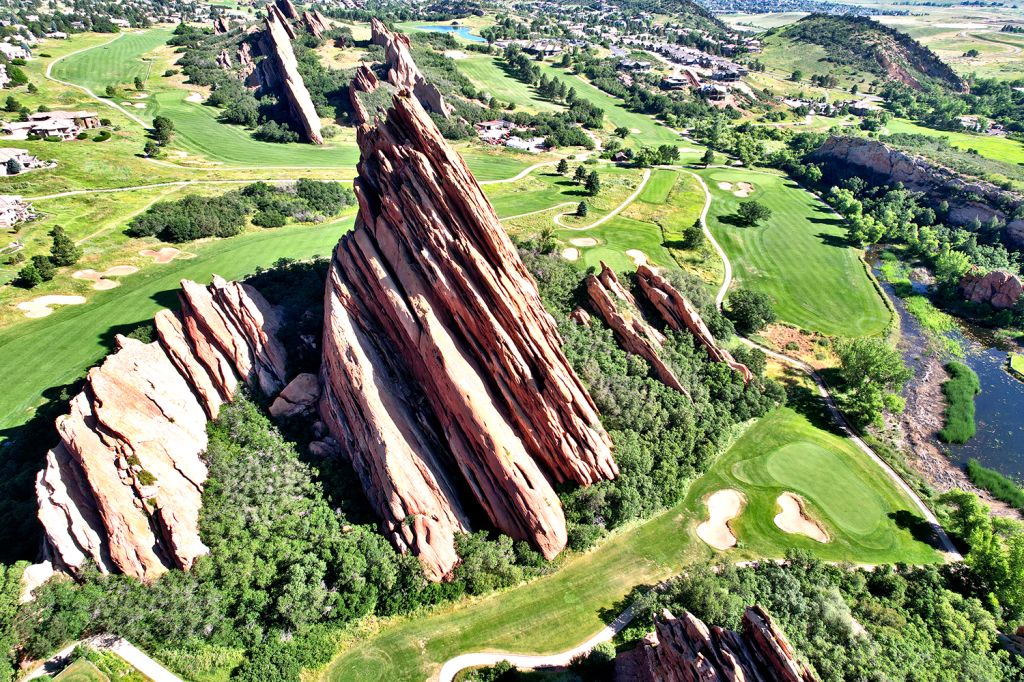
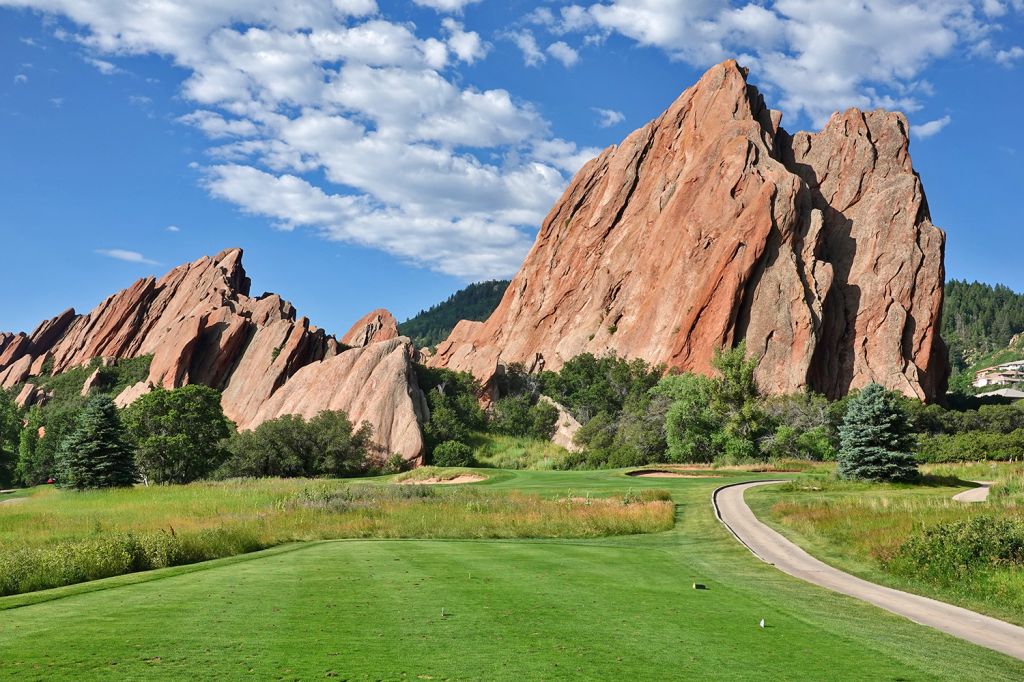
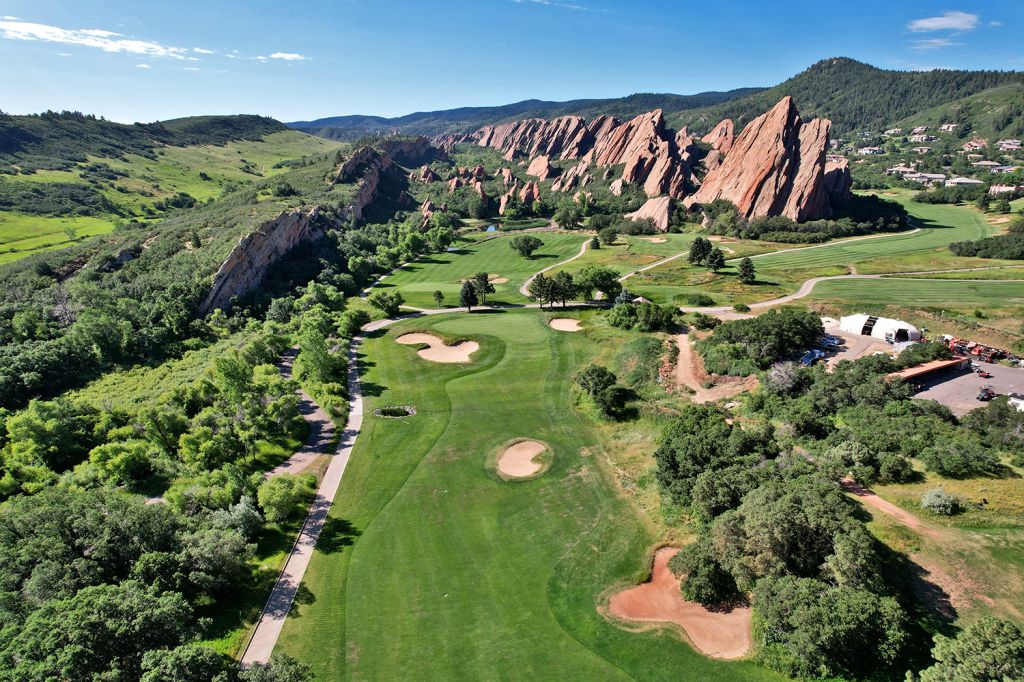
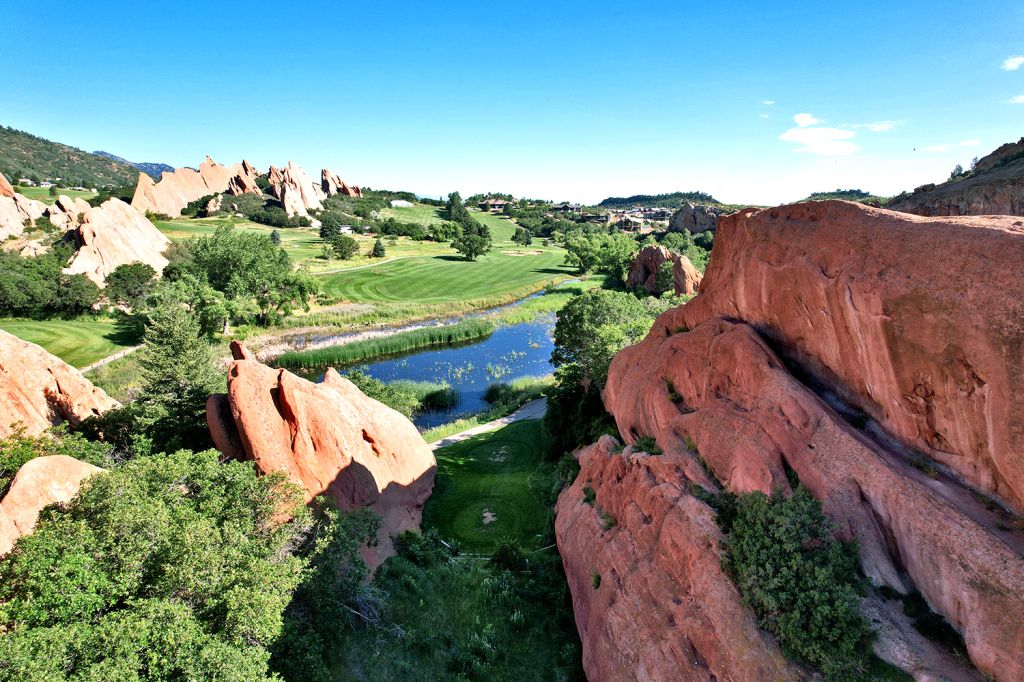
The Takeaway: With the dramatic rock formations jetting into the sky, Arrowhead feels like a trip through a state park more than a visit to a great golf course. The iconic orange rocks provide a stunning background, but the hole designs themselves aren't as compelling as the setting begs for. Grade C+
Quick Facts
Designer: Robert Trent Jones Jr. and Sr. 1972
Cost: Varies ($75 - $265) Click for current rates
Phone Number: 303-973-9614
Course Website: Official Website - Visit Arrowhead Golf Club's official website by clicking on the link provided.
Directions: Get here! - 10850 Sundown Trail, Littleton, Colorado 80125 – UNITED STATES
Photos: See additional photos of Arrowhead Golf Club
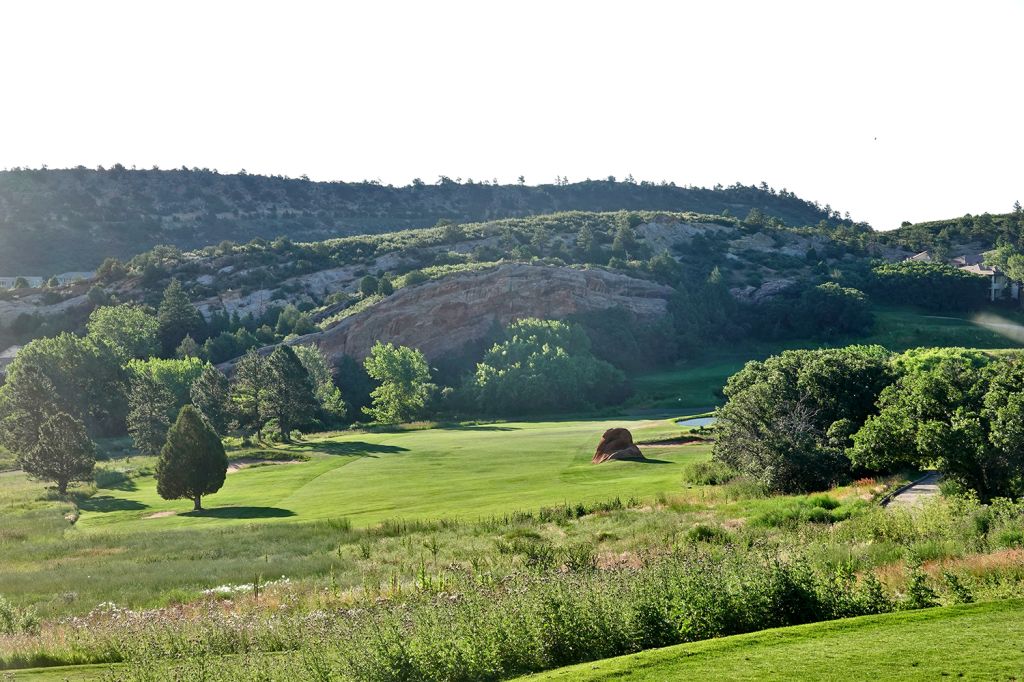
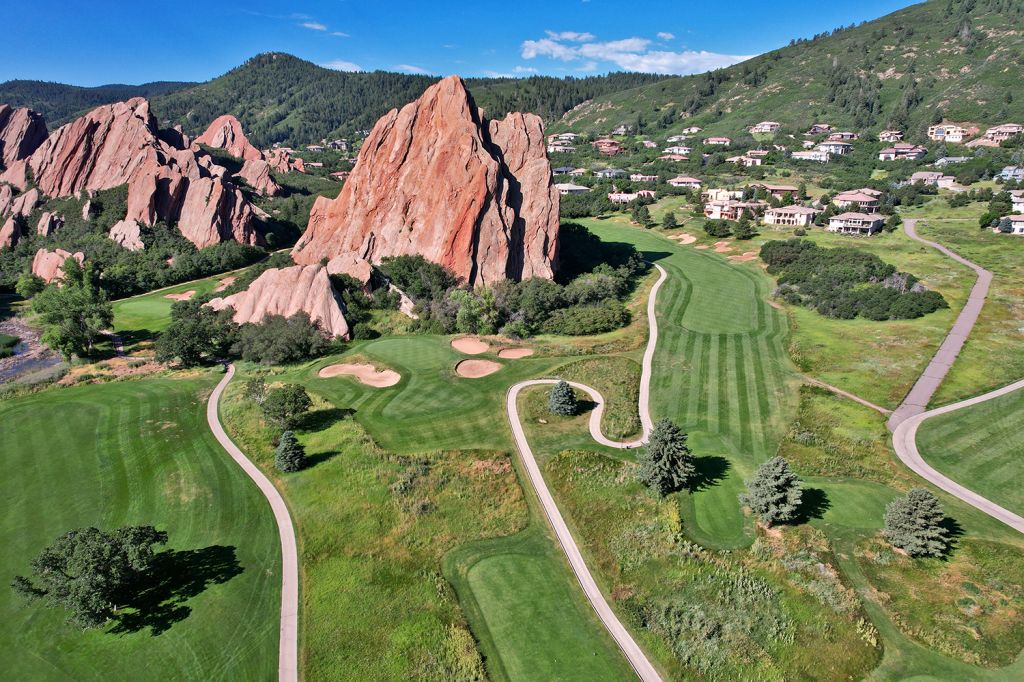
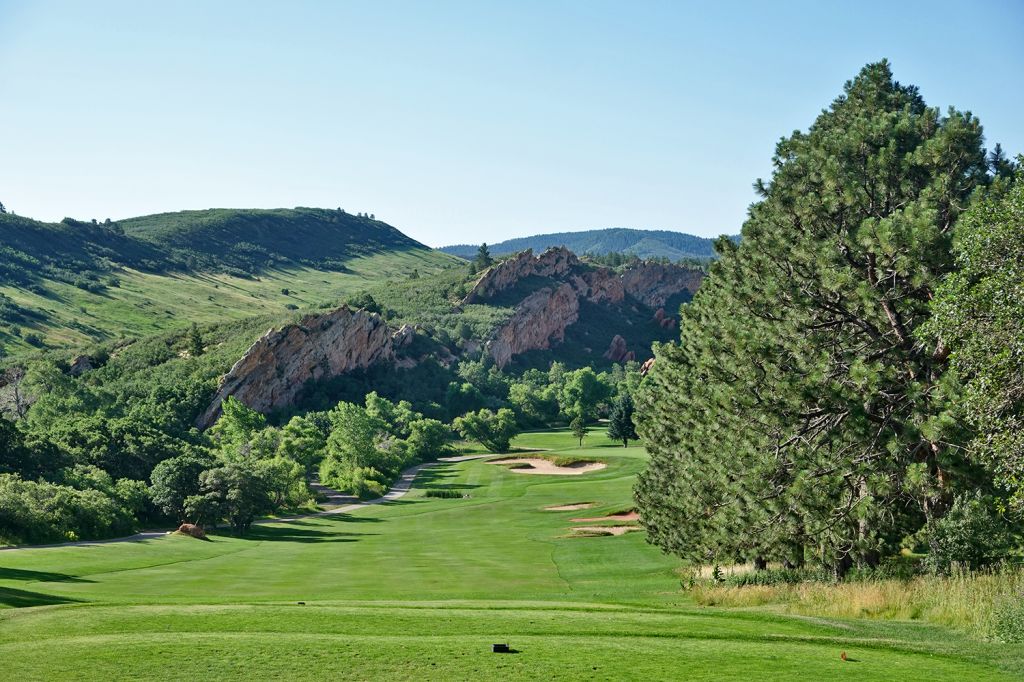
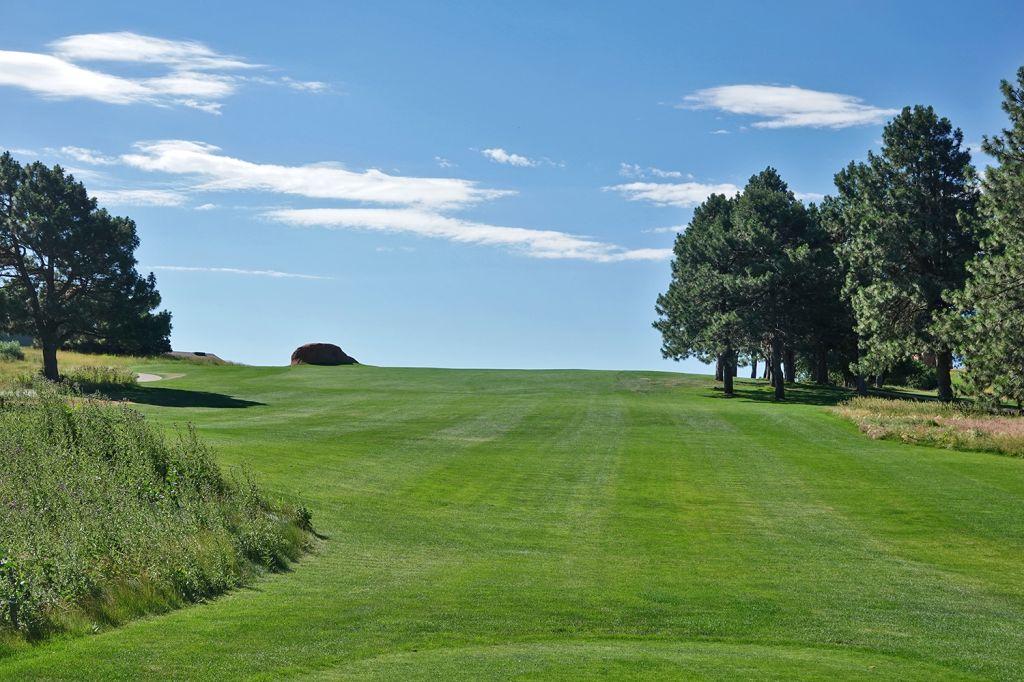
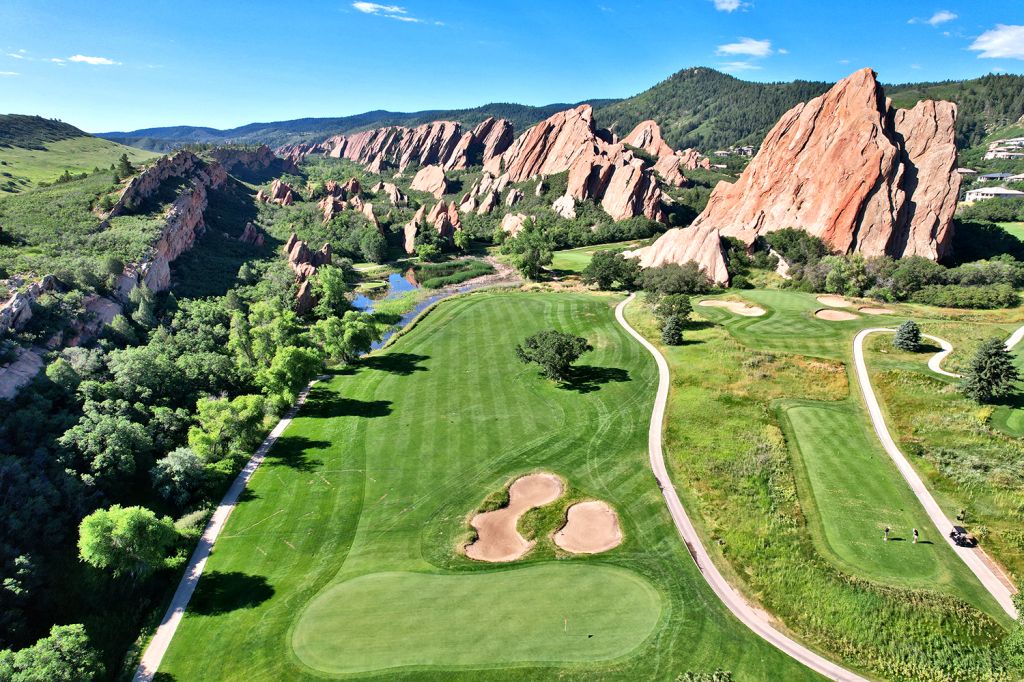
What to Expect: Located 25 miles south of downtown Denver, Arrowhead is a golf course known more for its scenery than it is for having great golf holes. The public access track is characterized by the stunning orange rock formations that jet into the sky on the back nine creating unforgettable backdrops. The park-like setting paired with a handful of water features are quick to attract a variety of wildlife to the course that increases the outdoor experience. From a course design perspective there isn't a ton to get excited about with a routing that promotes riding in a cart and hole designs that are quick to fade from memory. That being said, the collection of par threes are quite varied, memorable, and picturesque which can help attract patrons back. As a public course it represents one of the most unique settings in Denver and worth a visit, but there are plenty of stronger golf courses in the Centennial State.
By the Numbers
| Tees | Par | Yardage | Rating | Slope |
|---|---|---|---|---|
| Black Bear (Black) | 70 | 6636 | 72.0 | 139 |
| Arrowhead (Red) | 70 | 6302 | 69.9 | 135 |
| Silver Fox (White) | 70 | 5902 | 67.8 | 132 |
| Columbine (Yellow) | 70 | 5338 | 65.6 | 119 |
| Columbine (Ladies) | 72 | 5338 | 70.8 | 134 |
Individual Hole Analysis
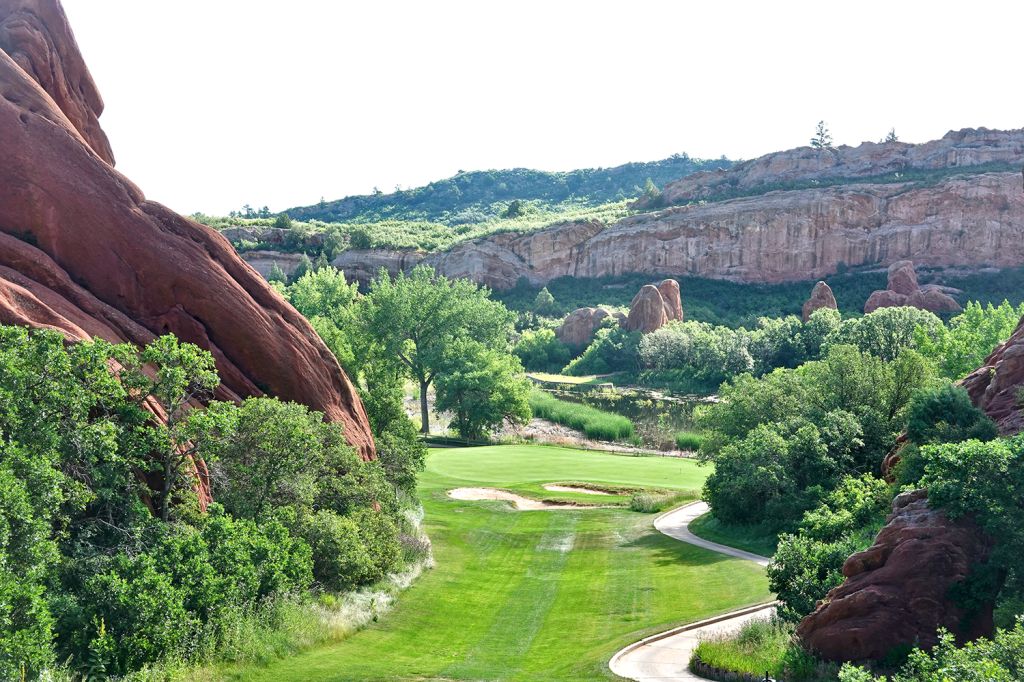
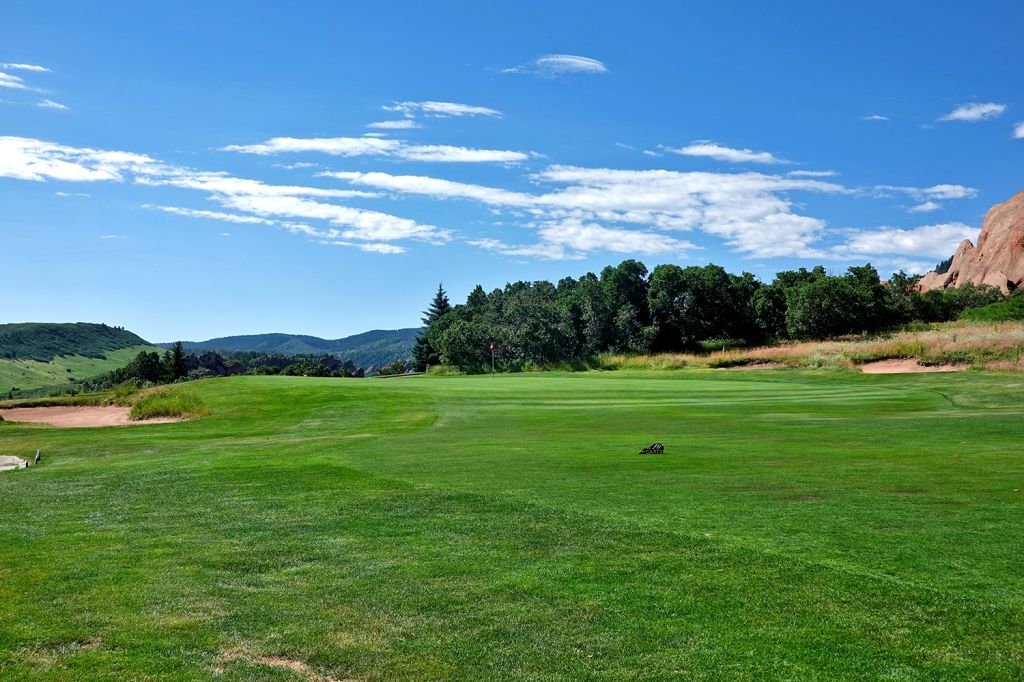
Signature Hole: 13th Hole – 173 Yard Par 3 – Completing a three hole loop around one of Arrowhead's most prominent soaring rocks, the 13th plays a club less downhill with the towering rock framing the left side of the hole. The green is twice as wide as it is deep, so distance control is paramount for success; especially considering there are a pair of bunkers fronting the putting surface. Caution should be given to going long considering a cart path runs behind the green and can propel balls into the pond beyond.
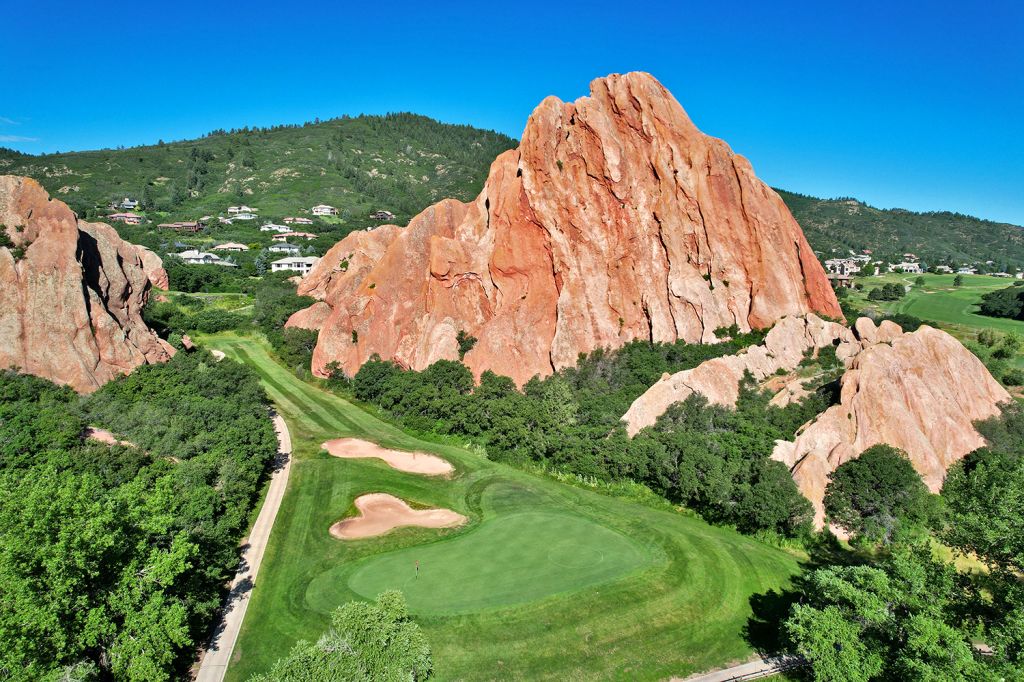
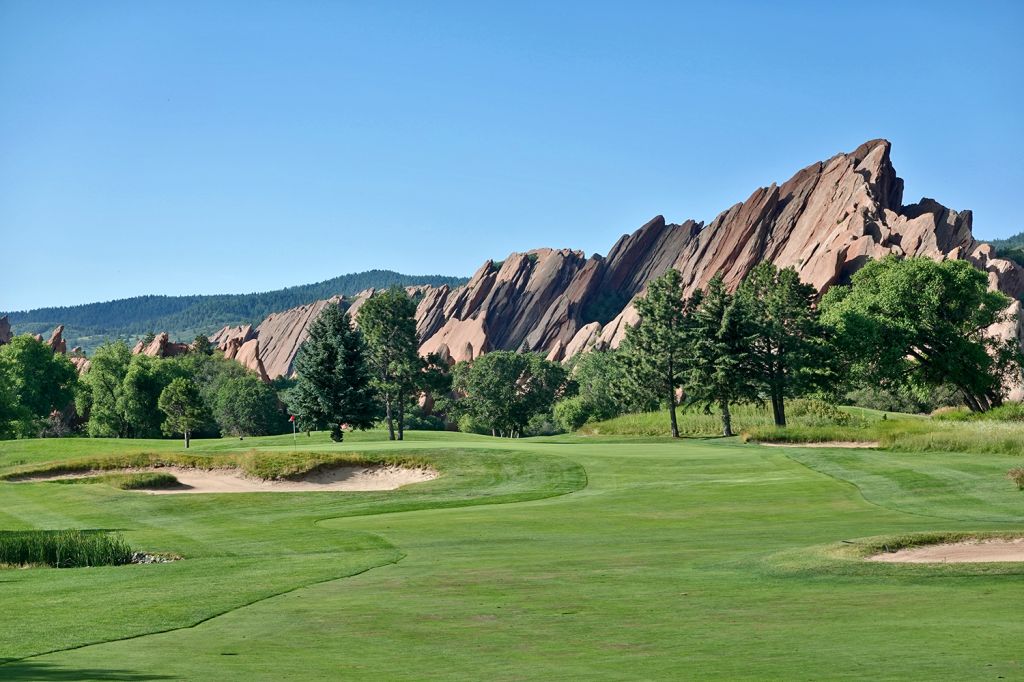
Best Par 3: 11th Hole – 156 Yards – The large, orange rock jagged mountains that billow out of the ground are the main attraction at Arrowhead, and players get up close and personal with its most staggering formation at the 11th. Creating a dramatic backdrop, the stone acts as an aiming point as players attack the green that features a trio of bunkers on the right and a single bunker on the left. The hole plays slightly uphill to a raised green, so taking a half club more is advised to acquire the desired distance to the flag. The green angles away from front right to back left, so sticking an approach shot in the back third of the putting surface presents a quality challenge.
Best Par 4: 10th Hole – 420 Yards – While players are teased with the rocks during the front nine, they get full exposure to them on the back nine with the first taste coming at the 10th hole. The tee shot plays downhill to a fairway that is heavily bunkered on the right and boasts a grove of trees on the left. The jagged rock mountains create the backdrop for the approach shot to the three-leaf clover shaped green that is fronted by a large bunker while the right side boasts an additional sand pit to avoid. The green features a spine running from front to back through the center of the putting surface which causes putts to break to the left or right off of it. Getting on the wrong side of the spine from where the flag is can quickly yield a three putt.
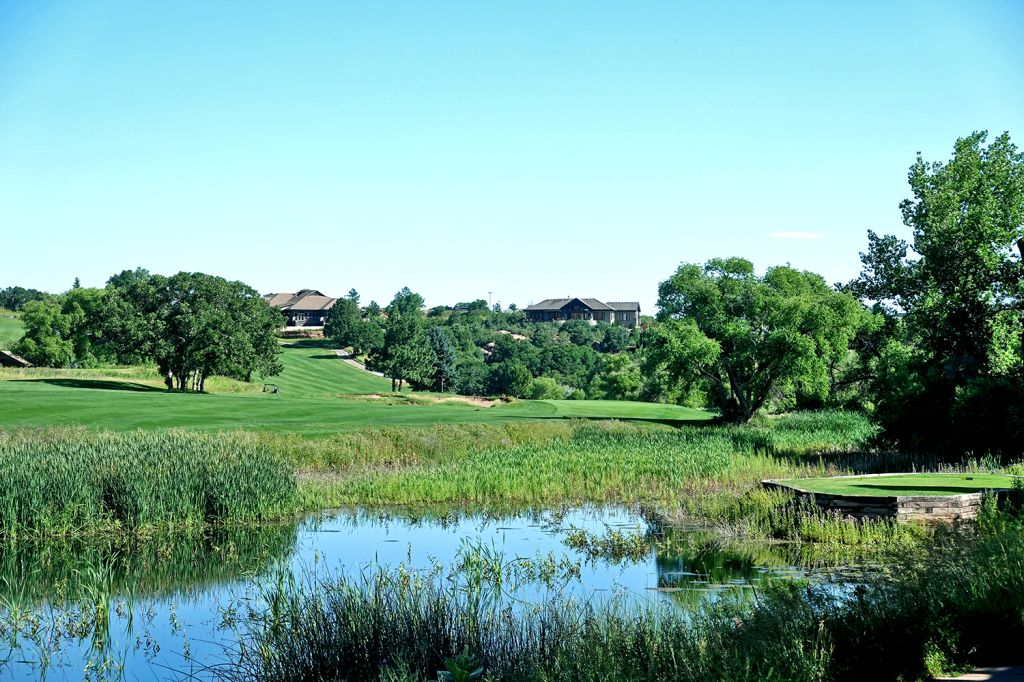
Best Par 5: 18th Hole – 502 Yards – The closing hole at Arrowhead presents a solid scoring opportunity, but not without needing to navigate some trouble. The tee shot plays uphill to a blind landing area where a pond awaits for players that hit their drive long enough or too close to the left side. Players laying up short of the pond will need to clear it on their second shot and make sure to not miss left where water runs the full length to the green. Bailing out to the right won't serve as an effective strategy since a pair of bunkers sit greenside, so hitting the clubs you are most confident in enroute to the green often yields the best results.
Birdie Time: 14th Hole – 365 Yard Par 4 – With the rocks now at your back, the 14th yields an opportunity to cut loose on your driver and put yourself in a favorable position to card a birdie. This short par four features a generous fairway, though slicing a ball to the right can end up going for a swim. A successful tee shot will leave a wedge into the green and an opportunity to go pinseeking in an effort to stick your ball close to the flag. The green is much wider than it is deep, but with the distance you should be coming in from, you should be able to hit your number. When the flag is on the far left you may yield a bit of caution with your aggressiveness, but on the right there is no reason to do anything but take dead aim at the cup.
Bogey Beware: 4th Hole – 432 Yard Par 4 – The 4th hosts a design feature that is always difficult to contend with; a fairway that bends one direction and slopes the opposite. A pond is found on the right side of the driving zone and then a second pond fronts the shallow green where the left half of the putting surface is so tight that you'd have to be in the zone to even think about attacking a flag located there. Hitting this green in regulation is extremely difficult and the design as a whole is a bit questionable, so take your bogey and move on.